
6 Things You Need to Know About Jumping
UPDATED ARTICLE HERE
Imagine smokin’ down the trail, skimming over rock-gardens, floating over roots, clearing gaps … braaaap! Not only is jumping a super cool skill that will impress all your friends, it’s actually quite practical! Oh, and it’s wicked fun. Why torture yourself with a gnarly rock outcropping when you can easily fly over it?
To help you enjoy a bit of the braaap that comes with catching air (and landing safely), we’ve broken down jumping into 6 easy to follow steps …
1. Inspect and Visualize
Prior to attempting the jump, get off your bike and inspect the jump and the landing. Figure out the best angle for approach and exactly where you’d like to land your bike. Then, visualize yourself successfully completing the jump. A simple rule that will keep you safe: if you can’t visualize yourself successfully completing the jump, don’t jump it. Perhaps the jump is too big? Or the face is too steep, or you’re unsure of the landing? Skip it and work on jumps you feel more comfortable with – then work your way up to the more difficult jumps.
Once you’ve visualized yourself jumping successfully and have determined the best line, it’s time to jump.

2. Get Ready
Ride towards the jump in a high ready position on the bike. Stay focused, present, and positive–a little positive self-talk is a great idea here. Once you reach the point of commitment (your last opportunity for bail-out), stop pedaling and raise up a little — relax.
3. Take Off
Next, as you transition down into your ready position, compress your bike with the goal of your compression ending on the face of the jump. Ideally, this should be a short powerful compression — think STOMP. Your elbows should be out and your knees bent.
Your compression (stomp) will result in an equal and opposite explosion / rebound thrusting your bike into the air. Let your bike fly! Be as light as you can at this point and allow the bike to rise into the air. If your timing is correct, you will sail right over your jump.
Note: If you are riding uphill, throw your weight forward as you go over an obstacle. If you are riding downhill, you will need to shift your weight backward as you go over it.

 THE IMPORTANCE OF COMPRESS AND EXPLODE
The biggest mistakes we see riders make when trying to jump is the lack of compression on the take-off (face) of the jump. If you don’t compress, or don’t compress at the right time, your bike will behave very similarly to a rock. Gravity will get the best of you (and your bike) and you will promptly get pulled back down to earth a la Newton’s apple. That’s not typically the desired result. So, throw your weight down like you mean it. Get aggressive. Grrrr.
Note: You don’t need suspension on your bike to compress it — compressing is merely the action of throwing your weight downward.
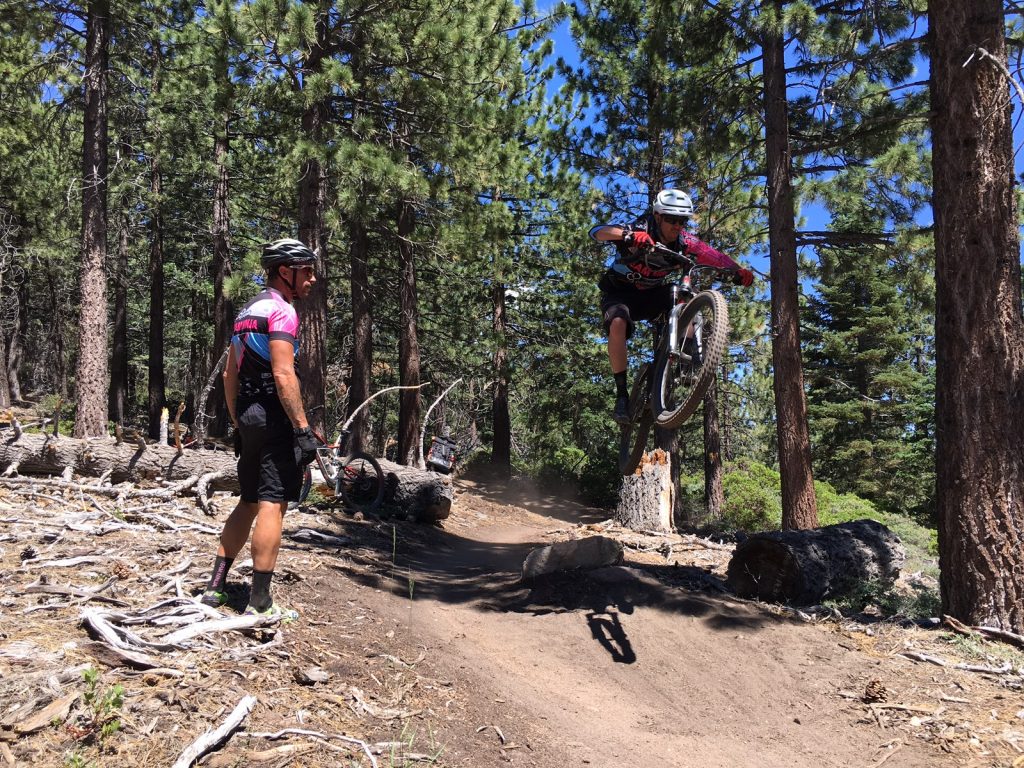
4. Landing
Once you’re flying, relax and resume your ready position and keep looking forward to your intended landing spot. Push your bike down onto your desired landing spot to increase your traction. Your arms and legs are your primary suspension when landing so keep them relaxed enough to absorb the impact, but sturdy enough so that you don’t lose control of your bike.
HOW TO LAND
If the jump has a descending landing, land on your front wheel right before your rear wheel. This will give you more directional control and smooth out the landing. If you land rear wheel first on a descending landing, the front of the bike is likely to pivot forward and slam the ground thus thrusting your weight abruptly forward and potentially over the front of the bike.
If your landing is flat, land with your rear wheel first. Landing on flat surfaces is more abrupt than landing on a descending landing. Landing on your rear wheel first allows you to use your legs to absorb the majority of the landing force. Relying on your suspension solely tends to cause a hard landing and a potential for loss of traction.
5. Practice
You’ll find that if you add more speed and more compression, you’ll fly higher and further. It’ll take some time to calibrate your brain, body and bike to take off and land precisely as you intend. Experiment with controlling your landing – rear wheel first, front wheel first, both wheels and then play with your distance and height.
Table-top jumps are the most forgiving and one of the best places to take your jumping skills to the next level. If you short a table-top (don’t make the landing), there isn’t much of a consequence, just land on the ‘top’ of the jump. Unlike a double where you have to make the landing spot or you risk casing your bike.

6. Have Fun
As your confidence (and skill) increases, pick bigger obstacles, going up and downhill while jumping, experiment with your air-time and HAVE FUN! If you’d like to learn more and practice jumping in a safe, controlled environment – we recommend you attend a Jumping Fundamentals Mini-clinic.
RELATED CONTENT: When Jumping My Feet Are Not Staying On The Pedals!


I like to attend one of your jumping clinic, due to work I can only do it on a Friday, Saturday or sunday, please let me know when there is going to be a jump clinic on those days, I live in temecula
Sure thing Igancio! We’ve got some weekend jumping clinics in the works now. Make sure you’re signed up for our Ninja Newsletter, we make all announcements there monthly.
Can you please advise me regarding optimal shock & fork settings for jumping? Pressure, rebound, etc. I ride a Giant Reign and weigh 150 lbs. I find I’m struggling a bit with the compress & explode and wondering if settings have anything to do with it.
Hi Demi! I recommend you start here to get your suspension dialed -> https://ridelikeaninja.com/2017/04/20/what-you-didnt-know-about-your-suspension-setup/ I wouldn’t drastically change anything on the setup past what that article says when preparing for jumping. While having your suspension setup correctly is important, I don’t make any significant changes to it if I’m going to jump.
Once you’ve got that setup, take some time to read Part 1 *and 2 of our jumping e-books here -> https://ridelikeaninja.com/jumping-instruction-manual-part-1/ If you notice you’re getting bucked on the take-off, slow your rear shock rebound down.
I suspect your issue has more to do with the timing of your compression and explosion. Pay close attention that that when reading the e-books.
Hi I’m going over some jumps that have a downward slope landing but my front wheel is hitting the ground way before my second wheel. What advice could you suggest please?
Hi Stephen — If the jump has a descending landing, you should land on your front wheel right before your rear wheel. This will give you more directional control and smooth out the landing. If you land rear wheel first on a descending landing, the front of the bike is likely to pivot forward and slam the ground thus thrusting your weight abruptly forward and potentially over the front of the bike.
When you say your front wheel is hitting the ground ‘WAY’ before your rear wheel, can you be more specific? Are you riding a nose wheelie when landing?
Also, we recently updated this article with better photos and slo-mo video that might help as well. Check here: https://ridelikeaninja.com/2018/10/23/pro-jumping-techniques-revealed/