
Suspension Setup, 4 Easy Steps
Getting your suspension setup correctly can make a huge difference to how well your mountain bike performs. Follow our 4 step guide to get your suspension dialed like the pros. Grab a friend, your bike, shock pump and notebook to get started …
STEP 1. ADJUST YOUR SAG
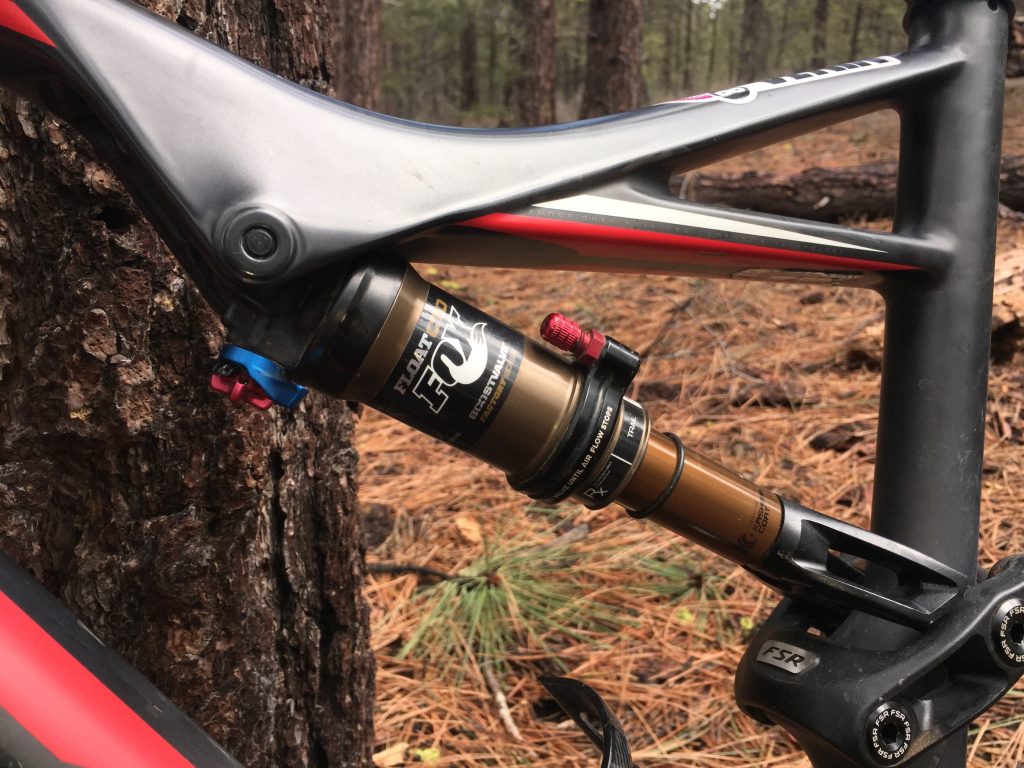
The first thing you need to do is to set the Sag by adjusting the amount of air pressure in your shock (this article deals only with air shocks). The term Sag refers to the amount of suspension travel that is used when you are on your bike in a riding position. Having Sag set correctly allows your wheels to track smoothly over rough terrain and stay in better contact with the ground. Not only will the suspension absorb bumps but it will push the wheels down into divots and holes on the trail to smooth them out and maintain traction. This is sometimes referred to as negative travel.
Not all bikes are the same but your bike will likely be designed to operate with a Sag point somewhere between 20% and 30% of its travel. You can check with your bike manufacturer for specifics, if you don’t have the information a good rule of thumb is 25%.
You can measure the Sag yourself but it is much easier with a second person to help you. If your shock has a lockout device make sure it is in the full open (softest) position. Turn all compression (blue knob) and rebound adjusters (red knob) to the full open position also. Turn knobs counter-clockwise to reach the open position.
Wearing your usual riding gear (this affects your weight) position yourself on the bike in the Ready Position (standing with body weight centered between front and rear wheels). Lock your front brake (not rear) and gently bounce on your bike a couple of times to help it settle into its travel. This is where it is particularly useful to have an assistant to help you balance on the bike. Have them hold the bike upright by placing their hands on the handlebars between the grips and the stem. Make sure they are not placing downward pressure on the bars while they help you balance.
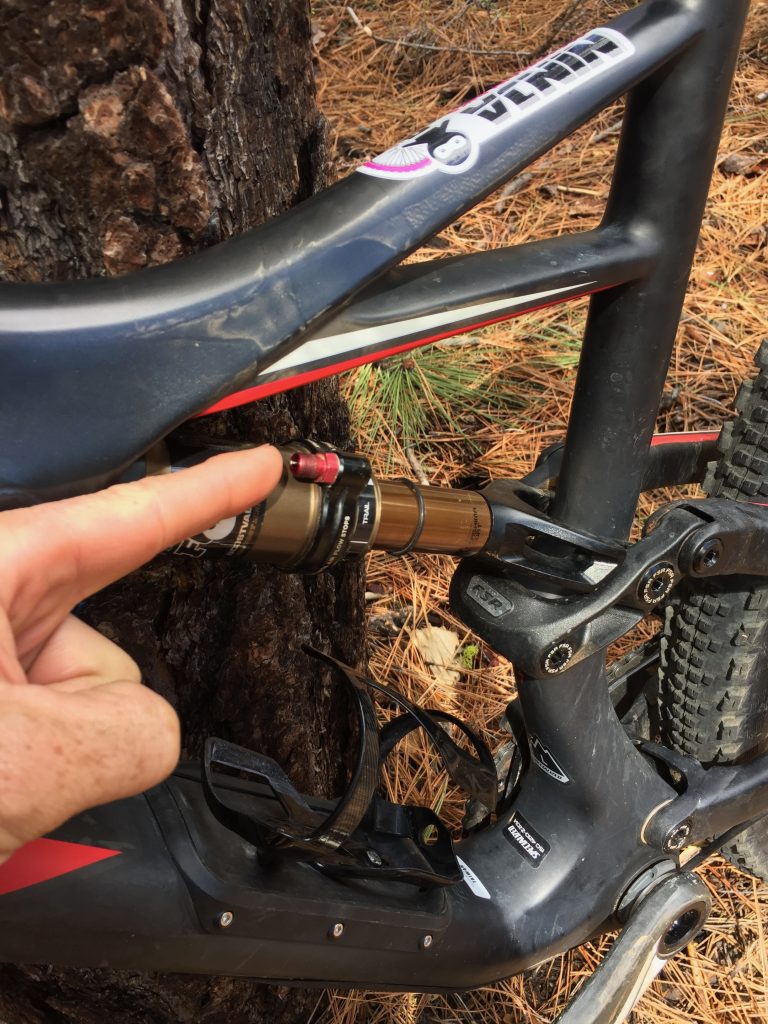
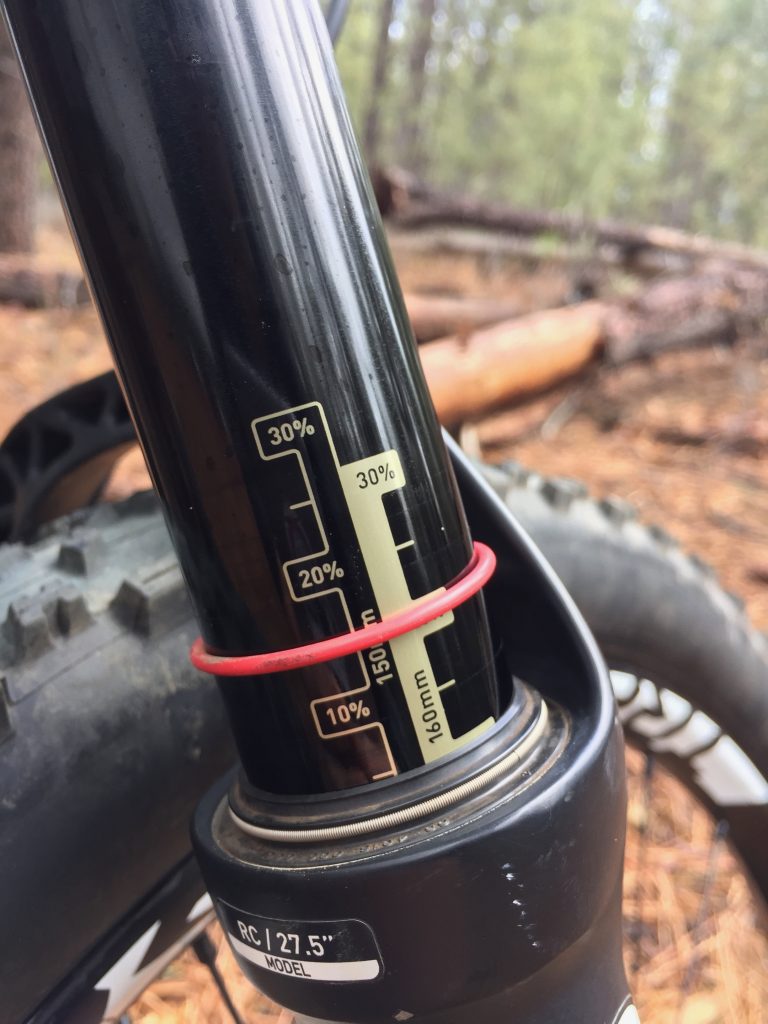
Most shocks come with a red or black rubber ring installed around the stanchion of the shock, if yours is missing you can install a zip tie in its place. While still in the ready position you now want to measure the amount of travel that is being used, starting with the rear shock. Have your assistant reach down with one hand and slide the rubber ring up the stanchion until it reaches the main body of the shock.
You now need to remove your weight from the bike. It is essential that you do not further compress the suspension as you get off to ensure an accurate reading. A good way is to very slowly backpedal until one foot is close to the ground. Then take your uppermost foot gently off the pedal, place it on the ground and step off the bike. You can now read your Sag setting. The rubber ring should be pushed about 25% of the way down the stanchion. If it is too close to the body of the shock the pressure is too high, release some air through the valve. If it is too far away from the body of the shock your pressure is too low, attach a shock pump and add some air.
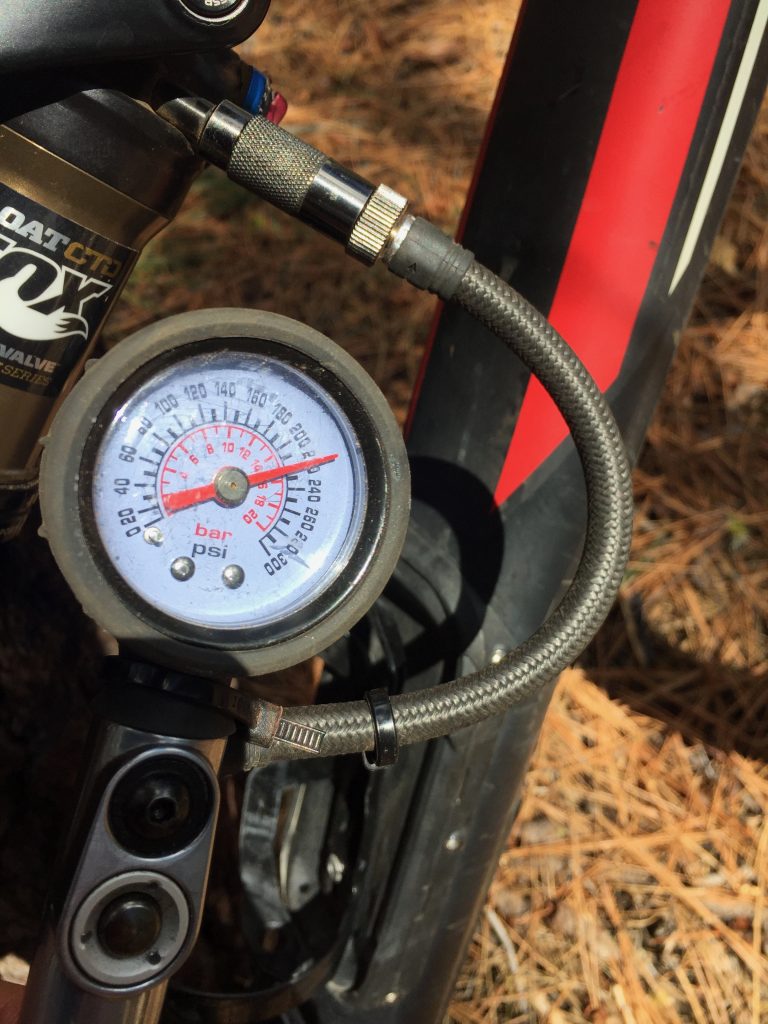
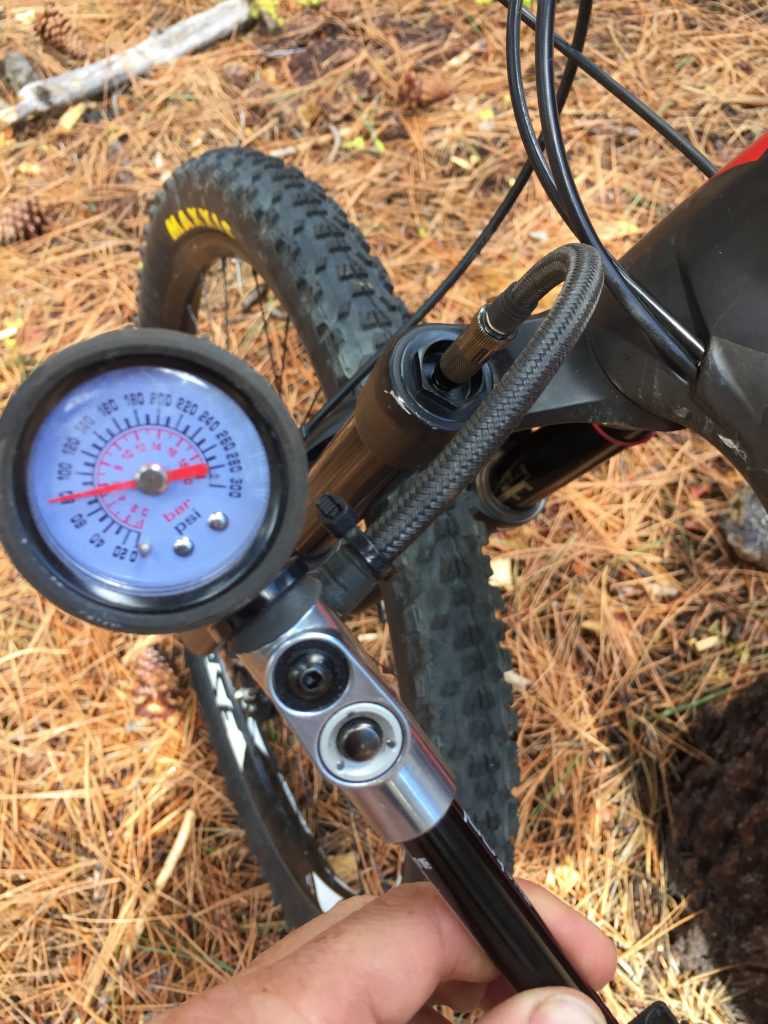
Make a note of what the pressure reading is on the dial of the shock while it is still attached. It is a good habit to keep a log of your suspension settings, you should start now by recording your air pressure and the amount of Sag it produces. Remove the shock pump (to prevent damage) and repeat the process. You will probably notice that some air escapes as you remove the pump, this will mean that your air pressure may now be slightly less than what you recorded it as. After removing the pump for the first time, reattach it and read the pressure. This will allow you to work out how much air escapes as you remove the pump and you can now account for it while making future adjustments. If you find you are losing 10 PSI, make sure to add an extra 10 PSI before removing the pump. Repeat this process until you achieve the desired amount of Sag.
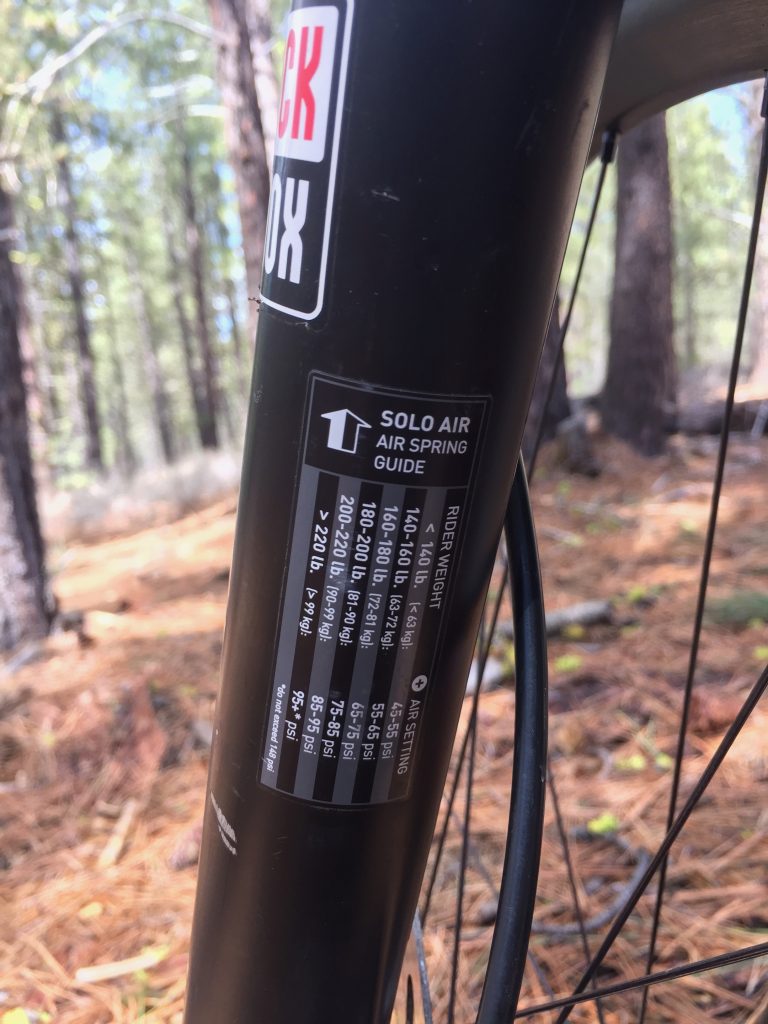
Some forks have a handy chart on the back of the fork lowers with some recommend pressures. These can be useful for determining a starting point.
Another thing worth mentioning is the autosag feature that has become more popular in recent years. If your bike has this feature, simply pump your shock up to 300psi, get on your bike in ready position, and push air-release valve on the shock until the air stops coming out (photo below). That’s it – super simple!
Once you have Sag set on your rear shock, repeat the process for your fork. Don’t forget to keep a log of your settings.
STEP 2. REBOUND DAMPING
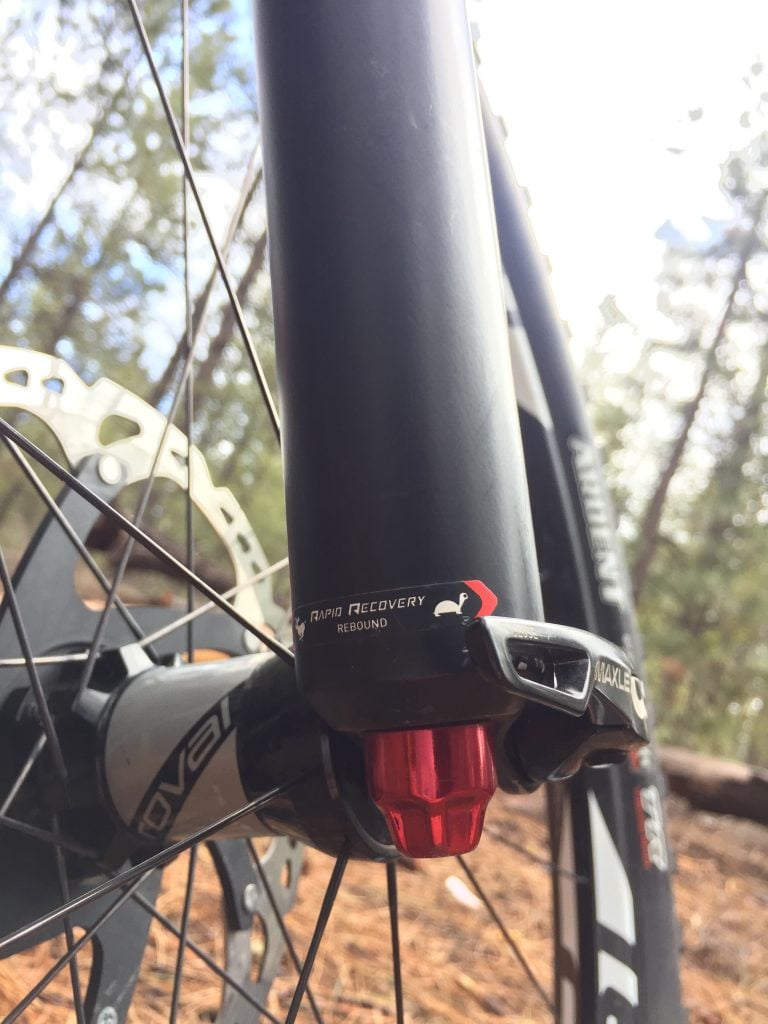
The next thing to look at is your rebound damping. Damping slows down the movement of your shock or fork. Rebound damping controls how quickly the suspension re-extends after it has been compressed. The rebound damping control is usually a red knob but on some shocks there is an adjustment that requires an allen key and some forks have a small plastic lever that protrudes from the bottom of the fork.
You activate the rebound damping by turning the control clockwise. Turning the control fully clockwise will give the slowest movement as the shock re-extends. Try turning the know fully clockwise and then compress and release the suspension. Observe how slowly it returns to make sure you understand how it works and the limits of control that you have over it.
You may notice that there are a lot of settings, probably in the range of 10-20 different settings that you could choose. Shocks are made this way to enable them to be used by people of various weights.
A heavy person requires greater air pressure inside the shock to achieve correct sag, greater air pressure causes the shock to re-extend more quickly which requires a lot of rebound damping to keep it under control.
A light person requires less air pressure to achieve correct sag and so the shock re-extends more gently requiring less rebound damping.
What this means is that even though your shock has a large number of potential settings, they are not all for you. The usable range for any given person is only 3 ‘clicks’ of the adjuster, the rest are either too fast or too slow to provide a good ride quality.
Here are a few symptoms of having too little rebound damping (shock re-extends too quickly). Your bike will feel ‘springy’ and uncontrolled. You will lose traction cornering on a bumpy surface as your tires will get pushed back so fast after bumps that they will lose traction causing washout. Takeoffs and landings from jumps and drops will feel uncontrolled as you get bucked by the suspension rebounding too quickly. Also while negative travel is important for keeping your wheel in contact with the ground, too much of a good thing is, well too much. If your suspension rebounds so fast that it is pushing your wheels down into every divot rather than skipping over some it will slow you down and may at times make the trail feel rougher than it should.
Setting your shock up with too much rebound damping (shock re-extends too slowly) will cause you to experience a harsh ride as your shock will not recover quickly enough between bumps and you will often be riding deep into your travel where the shock feels firmer.
Ideally you want the shock rebounding as quickly as possible without feeling uncontrolled or losing traction.
While finding your ideal rebound setting will take a little trial and error, here is a good way to find a base level to begin experimenting. This technique is for setting up the rear shock, it will not work for setting up your forks. Find a spot where you are able to ride your bike safely off a curb or similar object. The idea is to roll off in a slow and controlled manner with your full weight on the seat and look down at the shock to observe how it behaves. Again it is helpful to have an assistant for this though absolutely not necessary.
Begin with the rebound damping turned all the way off (fully counter clockwise). With the rebound off you will observe that when you ride off the curb the shock will compress, re-extend beyond the sag point and essentially bounce up and down a couple of times before settling back to Sag. Our aim is to tune this out so that the shock compresses and returns right back to the sag point without bouncing. Add one click of rebound damping and repeat the process. Keep repeating until the bounce is gone. Once you have found this point make a note of the setting in your log next to your PSI. This setting is the slow end of your 3 position range and a good place to start experimenting. Go ride a trail you are familiar with and note how the shock performs. You will find no benefit adding more damping to make the shock rebound slower than this setting, but you may find benefit in speeding it up one or two settings depending on the terrain. Bumpier terrain will require a slightly faster rebound.
While testing different shock settings only change one thing at a time or it will become difficult to tell which adjustment is having an effect. Keeping a log of your settings is the only sure way to keep track of what works and what doesn’t and allows you to freely experiment knowing you can always go straight back to your base setting. Also note that a change in your PSI will require readjustment of your rebound damping.
Once you have determined how fast your rear shock needs to rebound you can set the front to match. Ideally your front and rear suspension will rebound at close to the same speed to keep your bike balanced. Alternate between compressing your front and rear suspension allowing it to rebound without resistance and adjust the damping on your fork until the speeds seem to match. Then ride and experiment as you did with the rear.
STEP 3. SET YOUR COMPRESSION
An increasing number of shocks and forks also allow you to adjust the compression damping. Of the 3 types of adjustment discussed here, this is the most subjective and difficult adjustment to make. Fortunately it is also the least important. Setting the sag and rebound damping correctly are essential to performance and already play a large part in controlling how your suspension will compress. Compression damping allows you to fine tune it further. If your suspension has a lockout feature then you already have an understanding of how compression damping works because the lockout functions by adding a large amount of compression damping. It slows down or completely eliminates compression of the suspension allowing you to pedal more efficiently.

If your fork or shock also has a compression damping adjustment knob it allows you to fine tune it further. However, just because you could doesn’t mean you should. If you have set up your sag and rebound correctly, your compression should already be in a pretty good range without adding more damping. A good way to approach it would be to leave it off unless you have a particular reason to use it. That said here are some examples of where it can be useful. If you are on a ride where pedaling efficiency is a priority, add some compression damping to make your pedaling more efficient. If you find that your forks dive into their travel when you apply the brakes adding compression damping will help. If you frequently ride jumps or drops and find you are bottoming out your suspension on landings, adding compression damping may help.
It should be noted however that this help comes with a tradeoff as adding compression damping is going to make small bumps on the trail more noticeable and may reduce your traction slightly while cornering and braking. And though it adds efficiency while climbing, it also makes your suspension less effective through technical terrain which will cost you energy. It could be said that deciding how to use compression damping is all about prioritization and balance. Again remember to keep a log of your settings including your reasons for making changes and the effect that the change had on performance.
Alright! Now that you have spent some time tuning your suspension and observing how it works you should be in pretty good shape but there still may be some improvements to make. Get into the habit of pushing the rubber rings on your fork legs or shock shaft all the way down before you ride. At the end of your ride you can check them to see how much travel you have used. Ideally you should use close to all (90% or more) of your potential travel on most rides. If not your suspension is not performing optimally. Reduce the air pressure in 5 PSI increments until you see that you are using most of your travel without frequently or harshly bottoming out your suspension on bigger impacts. If you notice you are frequently bottoming your suspension add air in 5 PSI increments.
STEP 4. VOLUME SPACERS
If you are a heavy rider or have an aggressive riding style and have to add a lot of air to prevent bottom outs you will find that you suspension now feels too stiff and rides harshly. In this case you need to add a volume spacer. A volume spacer is a rubber or plastic ring that sits inside the air chamber of the fork or shock to reduce the amount of space inside. This will cause your suspension to become progressively stiffer as it moves through its travel. You can now reduce your PSI to regain plushness over small bumps while still reducing the likelihood of hard bottom outs on larger impacts.
![]()
Suspension only performs well when set up correctly, it is well worth taking the time to set it up and maintain it methodically. Remember to setup your suspension in the following order.
- Air Pressure – SAG
- Rebound Damping
- Compression Damping
- Volume Spacer (Spring Rate) only if required
Please comment below with your thoughts, ideas and questions. We’d love to help!


If you add volume spaces…do you go back to step 1?
Yes, Peter — exactly.
I have an ohlins coil spring fork, the travel is 150 mm. I believe that the spring may be to heavy for my weight, even on heavy hits there is still at least 30%travel left?
Yes, sounds like your spring is way too stiff for your weight. On the biggest hits you should use 90-95% of your travel.
You say the shock loses air when removing the shock pump. I believe the article is wrong – the shock only loses air when attaching the pump. So, in short, you don’t need to add extra air before removing the pump.
This is very well written, thank you! You’ve done a great job of simplifying a complex topic. You might just want to re-read and replace “dampening” with “damping.” I don’t think you meant to say that you were getting the suspension a little soggy 🙂 And for people learning suspension theory, seeing two different words for the same thing can be confusing.
Hah, good catch Molly. We just correct the error — thanks!
Pretty good article, although I do see a technical error.
It has been shown that if your shock pump and valve interface are working properly you DO NOT lose any air pressure when removing your hose, you lose air pressure when CONNECTING the hose.
When you figure out what pressure yo need, just remember when you RE-CONNECT the hose it will drop and show (maybe 8-10 lbs) less than what was actually in the shock or fork.
“You will probably notice that some air escapes as you remove the pump, this will mean that your air pressure may now be slightly less than what you recorded it as”
That air you hear “escaping” is just from the pump. Not the actual shock. The Schrader valve does not allow any air to escape. The reason you see less PSI when you reattached the pump is from the air in the shock filling the pump to that pressure. This is a common misconception we should try and clear up. Good article overall.
One of the best and easy to follow suspension setup articles I have read. Good job Richard!
I’ve read a lot of pages about suspension setup and I also think that this one is really nice: clear and simple yet complete…
I have 2 questions:
I’m a pretty heavy rider (240 pounds with all my gears) but I don’t really jump anything big. I just ride in trails. When you say that 90-95% of the shock should be used, is it for the agressive rider that do bigger features and then I could say that maybe for me it should be about maybe 80% of the travel or it just doesn’t work this way?
Also, I removed all the spacers in my fork suspension even if I’m the heavy side of a rider and I find it better this way… If so, does it mean that it should be the same with the back suspension ( there is no spacer there right now) or should I experiment as the back suspension seems to be more sollicitated and I found it less plush than the front. I already use less pressure that recommended on trek website ( fuel ex 9.8). 20% less up front and 8% less in the back… Thanks!
I Just read this article. It’s written really well and much easier to understand. I really liked how you even went as far as talking about the colors of the switches. In the past I’ve read a lot of articles and even watched some youtube videos on how to setup a full suspension bike. I just didn’t feel like I understood or retained all the info when trying to do the tasks. BUT now, I have a much better understanding all due to this article. Thanks for the science.
great article! well written, well organized, and easy to understand. nice job!