SPRING SAVINGS! 10% off All Jump Ramps | Use Code: MOBILE10

Ninja Mountain Bike Performance - Skills Clinics, MTB Jump Ramps and Bike Stands
@outboundlighting photo courtesy of @nataliestarr

Winter can be kind of a bummer for Mountain Bikers in most parts of the country. Unless you live in the Nation’s warmer regions like Arizona or Florida, it becomes downright difficult to ride in those winter months. It’s cold(er), the days are shorter (with much less light) and in a lot of places, the trails can pretty sloppy with little sun to melt the snow. So what to do? Night Ride!

Disclaimer: If the trails are too wet to freeze solid or it is unadvisable to ride for risk of creating ruts and trail damage, you might just have to take up another sport during the winter like hiking / running, skiing, snowshoeing or perhaps Fat biking.

If what precludes you from riding your bike in the winter is darkness, however, then night riding is a great option.

What You Need For A Night Ride

A group of people night riding
@outboundlighting photo courtesy of @nataliestarr

Lights

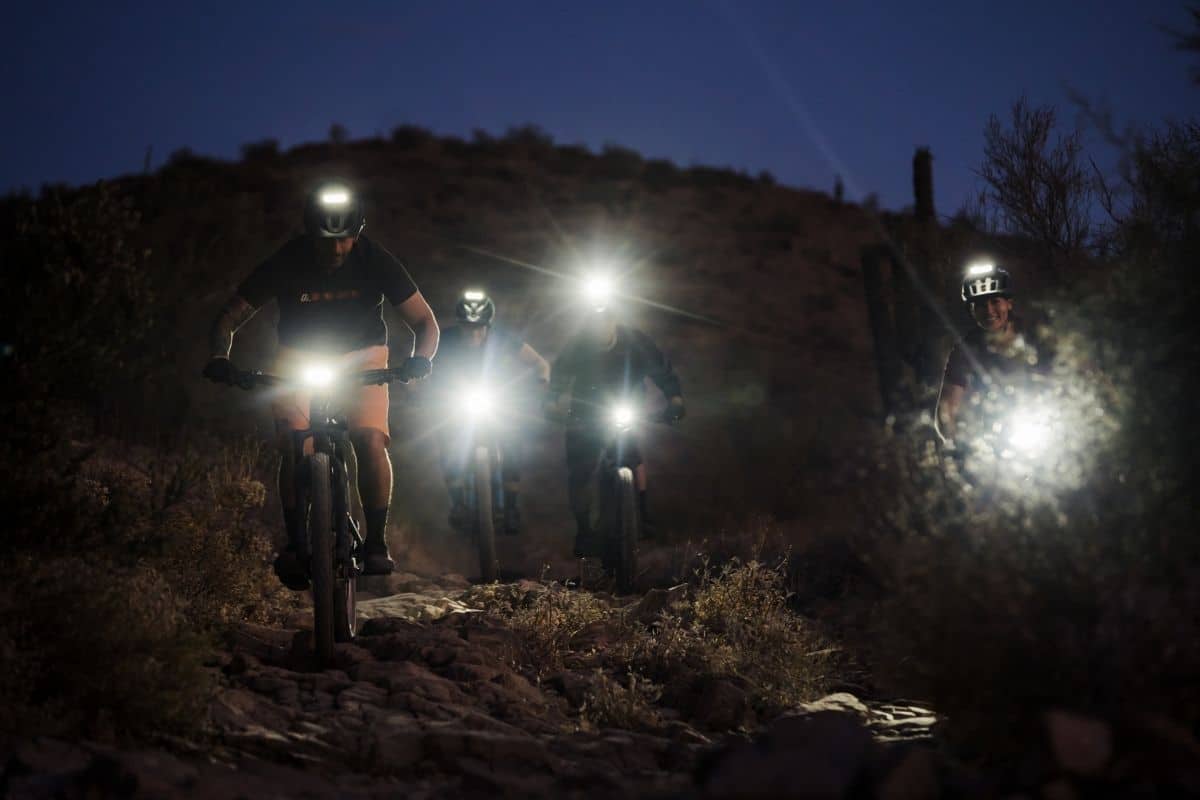
First and foremost, you’ll need to have some light to illuminate your adventures. Unfortunately, a camping headlamp won’t suffice. There are many brands and types of bike light setups available now days. A quick google search will yield hundreds of results, however, there are two basic types of lights you’ll want to look for: Handlebar lights and helmet lights. For maximum visual clarity, it’d be wise to invest in both. This will adequately light the trail in front of your bike/wheel (handlebar light) and also your field of vision (helmet light).

Bar lights simply illuminate the ground and space in front of your bike. If you turn your bike, the light turns with it. If you’re going downhill, you can see the trail straight in front of you. In case you crash, the light may seem to bounce down the trail (hopefully you’re not still attached to it).

Helmet Lights illuminate the spaces in which you are looking, or turning your head. Most of the time your head will be pointing in the same direction as the bike. However, in instances like corners, where you should be looking through the corner, your bike and your head will momentarily be pointing in slightly different directions. It’s important to not only see the trail in front of you, but the upcoming trail as it changes. For this reason, we recommend getting both a handlebar light and a helmet light. Many light companies, like Outbound Lighting, sell a combination pack that include both light types and often they are slightly “cheaper” when you purchase them together.

That being said, we know that lights can be pricey, so if you HAD to choose just one, the helmet light is safer (because it moves with your gaze). On the flip side, you can attach the handlebar light and battery/battery cable to your bike without having to carry a pack to hold the battery/wiring (which you must figure out with the helmet light). If you can only choose one, think about the trail(s) you’re most likely to ride, and what would be safest and most useful for your purposes.

If you only have a helmet light, then you must also have a place to hold the battery and cable that’s attached to the light…that’s attached to your helmet. Most people carry a pack and stick the battery/cable in the top compartment. Some people don’t mind the extra cable behind their backs and stuff the battery/attached cable into a back jersey pocket. For ease of use, we recommend using the helmet light with a backpack so you can safely store cables and remove possible tangle scenarios from your list of night riding hazards.

ProTip: Most light batteries have a use length of 60-90 minutes and the colder it is, the faster the battery wears down. Be sure to time your ride accordingly or carry an extra battery pack.

Layers

Winter Night Riding

Obviously, it’s winter, and in most places it’s colder than normal. Even in the desert, winter night riding is colder than daytime riding… at least when you first step outside. That being said, you’ll want to layer up.

Many cycling brands make cold weather riding gear. PEARL iZUMi, and Gore Wear are a few brands that have a large selection of cycling specific all-weather riding gear that is suitable for both mountain biking and road cycling (might as well double down on function). Apparel companies that manufacture road cycling gear, usually have a more robust selection of cold weather riding gear because road cycling is colder in general, and can be done year round (because pavement dries faster). Will you look super cool? Maybe. Will you stay super warm? Definitely.

However, you can also utilize normal cold weather gear you already have on hand. For the purposes of this list, we’re going to presume it’s 40 degrees Fahrenheit, or below.

Gear to Conisder

Gear you’ll want (and may already have):

That initial walk from your warm cozy home, to your garage or outside may leave you feeling apprehensive about your night time endeavors. However, once you start pedaling, your body will warm up and you may want to remove layers. Backpacks are highly recommended for night riding to store layers, water, tools and of course the aforementioned helmet light battery and cable.

ProTip: Make sure you have the warmest layers you will need. The worst that happens is they stay in your backpack and best that happens; you don’t get frostbite.

It’s especially important that you bring one additional warm layer, like a lightweight/packable puffer jacket and a beanie. If you have a mechanical issue on the trail, you’re going to need to stop to fix it. When you’ve been pedaling for a while, you might be warm and toasty while moving, or even break into a light sweat. If you have to stop – that sweat is going to get really cold, really fast. For this reason, you’ll want something you can stand around in for 10 minutes or more.

Friends

A group night riding
@outboundlighting Photo courtesy of @nataliestarr

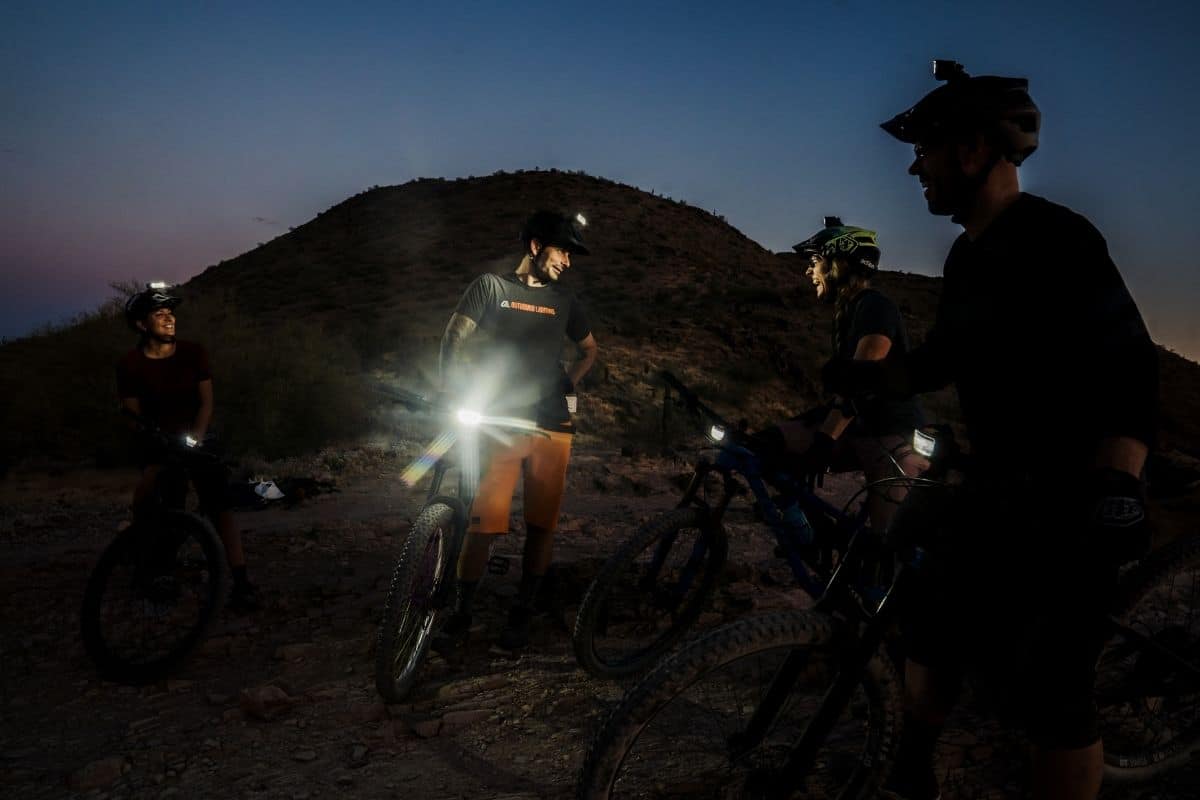
Solo mission or a pedal party with friends, it’s your choice. Night can make familiar trails seem new and you may want to try it both ways before you decide which is best. Depending on time of year, local temperatures and local wildlife, there may be some safety concerns and motivational factors to consider.

If you ride with friends, make it a celebration. It will give you something to email/text/call each other about leading up to the fun of the ride. Plan for a place to warm up together when you finish the ride. Warm food and something cold to drink can make the after party as fun as the preparation.

If a solo mission is your jam, be sure to let someone know where you are riding and when you plan to return. Cell phones can help if you run into trouble, but make sure you know your coverage before you go. It may still be worth coordinating with some friends to warm up and regal them with your stories.

ProTip: Not all trails are open at night. Be sure to check the county or city ordinance before you head out for a night ride. Some parks close at dusk and others have no curfew. There are a variety of reasons to close a trail when it gets dark, but we’ll save that discussion for another day.

For now, get suited up and ready to ride into the sunset… into the dusk…into the night. 2021 is the perfect year to have an adventure!

Leave a Reply

Your email address will not be published. Required fields are marked *

keep me in the loop

NOTIFY ME!

I’d like to be notified when new events are added.

Your Privacy is Protected. We will never sell or share your information.

Fundamentals Trail Application - Women's Only

Here’s What We’ll Cover

The specific skills taught in this clinic will depend on available trail features and will vary between locations. Skills covered may include:

  • Rock / Log Step-Ups 
  • Pedal Assisted Front Wheel Lifts
  • Steep Transitions, Roll-Downs
  • Reading trail and line choice
  • Using trail features for maximum flow
  • Turning (Low Speed)
  • Navigating Trail Obstacles
  • Switchbacks – Optimal Line Choice
  • Ratcheting application – how & when 
  • Track stands
  • Braking for Speed 
  • Shifting – Timing + Technique on Technical Terrain
  • Skinnies
  • Off-Camber Trails 
  • Berms 
  • Water crossings 
  • Roots 

The Schedule*

  • 1:15-1:30pm Meet your instructor  | Arrival at course venue + equipment check
  • 1:30 – 1:45pm Fundamentals Skills | Rapid Review 
  • 1:45 – 3:45pm Coached Trail Ride | Sessioning & Skills Application
  • 3:45-4:00pm Review, questions & next steps | #Ridelikeaninja

*Clinic schedule and skills covered may vary according to location and terrain.

Fundamentals Trail Application

Here’s What We’ll Cover

The specific skills taught in this clinic will depend on available trail features and will vary between locations. Skills covered may include:

  • Rock / Log Step-Ups 
  • Pedal Assisted Front Wheel Lifts
  • Steep Transitions, Roll-Downs
  • Reading trail and line choice
  • Using trail features for maximum flow
  • Turning (Low Speed)
  • Navigating Trail Obstacles
  • Switchbacks – Optimal Line Choice
  • Ratcheting application – how & when 
  • Track stands
  • Braking for Speed 
  • Shifting – Timing + Technique on Technical Terrain
  • Skinnies
  • Off-Camber Trails 
  • Berms 
  • Water crossings 
  • Roots 

The Schedule*

  • 1:15-1:30pm Meet your instructor  | Arrival at course venue + equipment check
  • 1:30 – 1:45pm Fundamentals Skills | Rapid Review 
  • 1:45 – 3:45pm Coached Trail Ride | Sessioning & Skills Application
  • 3:45-4:00pm Review, questions & next steps | #Ridelikeaninja

*Clinic schedule and skills covered may vary according to location and terrain.

Ninja Kids clinics

Here’s What We’ll Cover

Some of the skills taught and practiced in the Kids Fundamentals Clinic may include:

  • Ninja (Ready) Position
  • The Riding Rainbow: Body Position
  • How to use your gears
  • Front + Rear Wheel Lifts
  • Safely getting on/off your bike
  • Getting over trail obstacles
  • Turning + Switchbacks
  • Reading the trail: Red Light, Yellow Light, Green Light
  • When and how to brake
  • The 4 Climbing Positions
  • Descending in control
  • How to have fun and be safe!
  • Safety check, bike care

Clinic schedule, time and skills covered may vary according to location and terrain.

2-Day CAMPS

Sample Camp Schedule*

Day 1 (Saturday)

  • 8:45-9:00 Meet your instructor  | Arrival at course venue + equipment check
  • 9:00-9:15 Let’s get started | Introductions, camp overview, bike safety check, bike set-up review
  • 9:15-9:30 Warm-up ride | Head to skills area
  • 9:30-12:15 Mornings skills session | Ready position, bike-body separation, effective braking, fluid shifting, body positioning, wheel lifts
  • 12:15-1:30 Lunch break | BYO
  • 1:30 – 4:00 Intro to jumping | Manuals, bunny hops + how to safely jumping (and land) your mountain bike

Day 2 (Sunday)

  • 8:45-9:00 Meet at trailhead | Gear up for day 2!
  • 9:00-9:15 Review | Brief review of Day 1 skills
  • 9:15-12:00 Morning skills session | High-speed cornering, switchbacks, drops, rock dodge, technical climbing & descending
  • 12:00-1:00  Lunch break | BYO
  • 1:00-3:45 Trail ride + skills application | Put those skills to work!
  • 3:45-4:00 Review, questions & next steps | #Ridelikeaninja


*Clinic schedule and skills covered may vary according to location and terrain.

After camp, you will see an immediate improvement in your riding and a boost in confidence on technical trails. You will be able to tackle rougher terrain and corners with greater control and flow through singletrack, switchbacks, and berms with more speed and efficiency.

Jumping Mini-Clinics

Here’s What We’ll Cover

Some of the skills taught and practiced in the Jumping Mini-Clinic may include:

  • Wheel lift Review
  • Bunny hops
  • Jumping body positioning
  • Anatomy of a jump
  • Speed vs. compression | How and when?
  • Landing with precision
  • Let’s get jumping! | Jump progressions

The Schedule*

Please note, clinics may vary according to location and terrain.

  • 1:30-1:45  Meet your instructor | Arrival at course venue + equipment check
  • 1:45-2:00 Let’s get started | Introductions
  • 2:00 – 2:30  Intro to jumping | Wheel lifts, manual, bunny hop
  • 2:30 – 3:00 Reading the jump | Anatomy of a jump, speed vs compression, landings
  • 3:00 – 3:45 Let’s jump! | Jumping progressions on table tops
  • 3:45-4:00 Review and next steps | #ridelikeaninja


*Clinic schedule and skills covered may vary according to location and terrain.

Intermediate / advanced clincs

Here’s What We’ll Cover

Some of the skills taught and practiced in the Intermediate/Advanced clinic may include:

  • Negotiating trail obstacles (i.e. rock gardens, roots, logs)
  • Steep transitions
  • Drops
  • High speed cornering
  • Technical climbing
  • Technical descending
  • Advanced braking
  • Reading the trail
  • Introduction to energy management & flow
  • Pumping for speed & air
  • Technical Switchbacks (where available)
  • Ratcheting & Trackstands
  • Visualization

The Schedule*

  • 8:45-9:00 Meet your instructor  | Arrival at course venue + equipment check
  • 9:00-9:15 Let’s get started | Introductions
  • 9:15-9:45 Accelerated review of Fundamentals | With intermediate+advanced progressions
  • 9:45-12:00 Morning skills session | High-speed cornering, Switchbacks, drops, rock dodge, technical climbing & descending
  • 12:00-1:00  Lunch break | BYO
  • 1:00-3:45 Trail ride + skills application | Put those skills to work!
  • 3:45-4:00 Review, questions & next steps | #Ridelikeaninja

*Clinic schedule and skills covered may vary according to location and terrain.

WOMEN'S ONLY Fundamentals Combo

Here’s What We’ll Cover

The specific skills taught in this clinic will depend on available trail features and will vary between locations. Skills covered may include:

  • The Ready Position
  • Bike/Body Separation
  • Intro to Steep Transitions
  • Effective Braking
  • Braking for speed
  • Wheels lifts – Step-Ups
  • Shifting, Timing & Cadence
  • Negotiating trail obstacles
  • Turning / Switchbacks
  • Climbing + Descending
  • Dismounting
  • Mind skills
  • Steep Transitions, Roll-Downs
  • Reading trail and line choice
  • Using trail features for flow
  • Turning (Low Speed)
  • Ratcheting – how & when 
  • Track stands
  • Skinnies
  • Off-Camber Trails
  • Berms
  • Water crossings
  • Roots

The Schedule*

  • 8:45-9:00  Meet your instructor  | Arrival at course venue + equipment check
  • 9:00-9:15 Let’s get started | Introductions
  • 9:15am – 11:15 Skills & drills | Learn, learn, learn
  • 11:15am – 12:15 Take it to the trail | Apply what you’ve learned
  • 12:15 – 1:30pm Lunch Break | Rest & Refuel
  • 1:30 – 1:45pm Fundamentals Skills | Rapid Review 
  • 1:45 – 3:45pm Coached Trail Ride | Sessioning & Skills Application
  • 3:45-4:00pm Review, questions & next steps | #Ridelikeaninja

*Clinic schedule and skills covered may vary according to location and terrain.

Co-ed Fundamentals Combo

Here’s What We’ll Cover

The specific skills taught in this clinic will depend on available trail features and will vary between locations. Skills covered may include:

  • The Ready Position
  • Bike/Body Separation
  • Intro to Steep Transitions
  • Effective Braking
  • Braking for speed
  • Wheels lifts – Step-Ups
  • Shifting, Timing & Cadence
  • Negotiating trail obstacles
  • Turning / Switchbacks
  • Climbing + Descending
  • Dismounting
  • Mind skills
  • Steep Transitions, Roll-Downs
  • Reading trail and line choice
  • Using trail features for flow
  • Turning (Low Speed)
  • Ratcheting – how & when 
  • Track stands
  • Skinnies
  • Off-Camber Trails
  • Berms
  • Water crossings
  • Roots

The Schedule*

  • 8:45-9:00  Meet your instructor  | Arrival at course venue + equipment check
  • 9:00-9:15 Let’s get started | Introductions
  • 9:15am – 11:15 Skills & drills | Learn, learn, learn
  • 11:15am – 12:15 Take it to the trail | Apply what you’ve learned
  • 12:15 – 1:30pm Lunch Break | Rest & Refuel
  • 1:30 – 1:45pm Fundamentals Skills | Rapid Review 
  • 1:45 – 3:45pm Coached Trail Ride | Sessioning & Skills Application
  • 3:45-4:00pm Review, questions & next steps | #Ridelikeaninja

*Clinic schedule and skills covered may vary according to location and terrain.

Ninja MTB Logo

Women's Only Fundamentals Clinics

Level 1 - Here’s What We’ll Cover

Some of the skills taught and practiced in the Women’s Only Fundamentals Clinic may include:

  • The Ready Position
  • Bike/Body separation
  • Intro to Steep Transitions
  • Effective braking
  • Wheels lifts
  • Shifting + cadence
  • Negotiating trail obstacles
  • Turning / Switchbacks
  • Climbing + Descending
  • Dismounting
  • Mind skills

The Schedule*

  • 8:45-9:00  Meet your instructor  | Arrival at course venue + equipment check
  • 9:00-9:15 Let’s get started | Introductions
  • 9:15am – 11:15 Skills & drills | Learn, learn, learn
  • 11:15am – 12:00 Take it to the trail | Apply what you’ve learned
  • 12:00-12:15 Review and next steps | #ridelikeaninja
 

*Clinic schedule and skills covered may vary according to location and terrain.

Ninja MTB Logo

Co-ed Fundamentals Clinics

Level 1 - Here’s What We’ll Cover

Some of the skills taught and practiced in the Fundamentals Clinic may include:

  • The Ready Position
  • Bike/Body separation
  • Intro to Steep Transitions
  • Effective braking
  • Wheels lifts
  • Shifting + cadence
  • Negotiating trail obstacles
  • Turning / Switchbacks
  • Climbing + Descending
  • Dismounting
  • Mind skills

The Schedule*

  • 8:45-9:00  Meet your instructor  | Arrival at course venue + equipment check
  • 9:00-9:15 Let’s get started | Introductions
  • 9:15am – 11:15 Skills & drills | Learn, learn, learn
  • 11:15am – 12:00 Take it to the trail | Apply what you’ve learned
  • 12:00-12:15 Review and next steps | #ridelikeaninja
 

*Clinic schedule and skills covered may vary according to location and terrain.

LEAVING SO SOON?

60% Off

IF YOU SIGN UP FOR A MTB SKILLS CLINIC TODAY!

Enter your email below to get your limited time coupon code (valid for 48 hours).

Valid on all Skills Camps and Clinics. Your Privacy is Protected.

Awesome sauce!

60% Off

USE THIS CODE TO SIGN UP TODAY!

CHECKOUT4XY2

*Limited time offer. Valid for 48 hours on any upcoming MTB skills clinic or camp.