SPRING SAVINGS! 10% off All Jump Ramps | Use Code: MOBILE10

Ninja Mountain Bike Performance - Skills Clinics, MTB Jump Ramps and Bike Stands

Drops come in all shapes and sizes. Rocks, roots, human built wood features and natural elevation changes all create drops ranging from the size of a curb to the size of a building. When ridden correctly, drops are Fun-with-a-capital-F. However, before you start sending yourself off the biggest drop you can find, it’s important to understand some basic concepts and get your drop technique dialed.

There are multiple techniques for riding a drop and with no standard mountain biking dictionary, you’ve likely heard these different drop styles called multiple different names: the squash, basic form, down/back, huck, whip, racer style, stomp n’ send, (pre)-load n’ explode. Phew, that’s a lot of names.

In this article we are going to focus specifically on technique that we call the “Down/Back Technique”. We’ve also heard this method referred to as a “Basic Drop” or “Manual Style”. The Down/Back Technique is an important foundational technique to have in your riding tool belt! With that, let’s get to dropping…

1. Scout It Out

Take note of the condition of the drop – this includes any rocks, roots or logs. How steep is it? What does the landing look like? What are the consequences of overshooting or undershoot the landing?

When you first start riding drops, you may want to get off your bike to investigate a drop before “sending it”. This will help you to gather important information about setting your speed, anything you need to prepare for in the landing area, etc. Start small, say 1-2 ft, and build up from there.

2. Approach

Roll up to the drop at the correct speed – which you will have already determined in step 1 after scouting out the drop. Knowing the correct speed for a drop takes time and (progressive) practice. If you are going too slow, your front wheel will dive as soon as it rolls off the edge and could toss you over the bars. Too fast and you might overshoot the landing. We don’t want either of those so be sure you approach at the right speed. If you aren’t sure on the speed, watch another rider first or maybe have a (reliable) buddy who has ridden the drop before “tow” you in to help you set the correct speed.
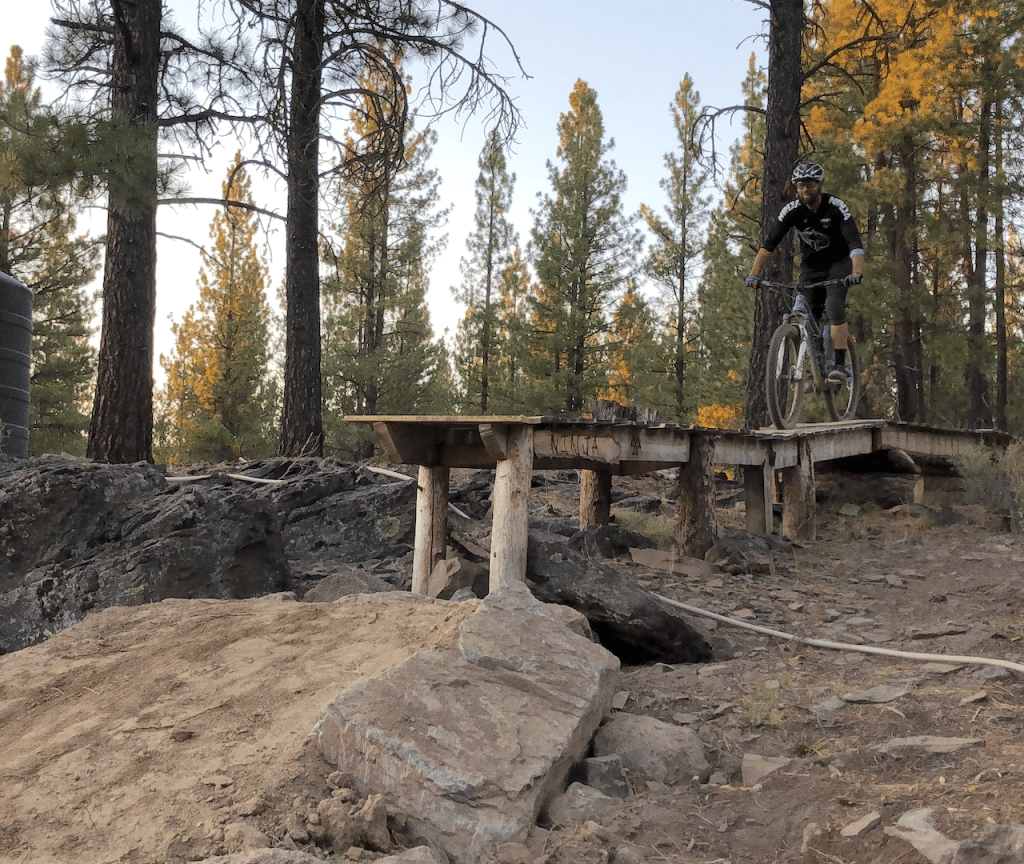
3. Down + Back

The next two movements, down and back, are done quickly in rapid succession. This explosion down and back will create an L shaped movement. The goal of this movement is to keep your front wheel level with the take off until the back wheel leaves the drop (ramp, rock, root). This will prevent your wheel (and you) from dropping down nose first (thanks gravity!).

First, drop DOWN into your ready position as your front wheel approached the edge of the drop. This means:

Just as your front wheel reaches the edge, shoot your hips straight back, lightly hanging off the handlebars. Your arms should straighten and you should not be pulling back on the bars.

This down + back L shaped movement is similar to the movement used to initiate a manual (but you don’t need to be able to ride a manual to successfully hit a drop with this technique). Be sure to note that going diagonally back in one motion, rather than dropping straight down and then back in two distinct motions, will not have the same results!

If you are new to riding drops, before you hit the trail, we recommend practicing the down-back “manual” motion in a flat open area. You should be able to get your front wheel to lift off the ground by hanging back for a second. Get your body used to this movement and then take it to the drops
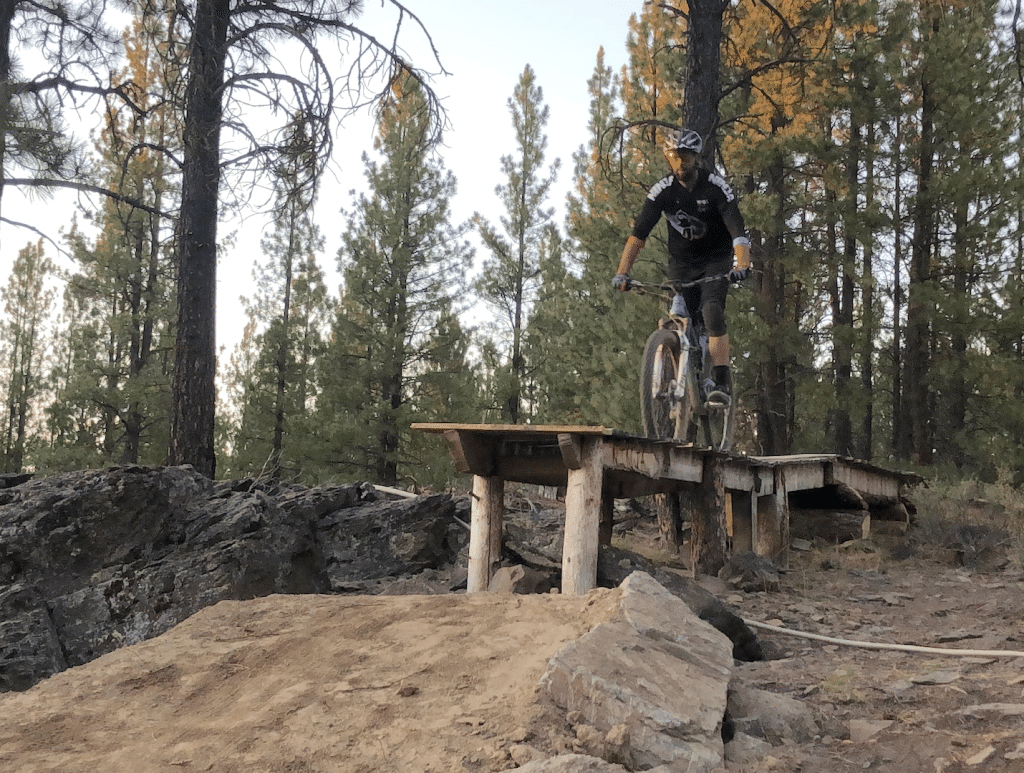
4. Re-center

Re-center your weight as soon as the rear wheel leaves the drop. This will put you in a position that allows you to use your handlebars and arms to match your bike to the angle of the landing. Utilize the “suspension” in your arms to push the bike down to meet the landing.

If you don’t re-center and you land too far back on the bike, your front wheel will start to loose traction and you loose the ability to control the front of the bike.

The slower you ride the drop, the more explosive your down/back movement will need to be. When riding slower, it will take longer for your rear wheel to reach the edge of the drop, which means you will need to keep that front wheel up for slightly longer. A faster drop will require less of a shift back because the rear wheel will reach the end of the drop faster. You may find that doing drops at a higher speed can be easier, but that doesn’t mean all drops are meant to be ridden at high speed so take your time to walk through the steps above to find drop success!

5. Keep it Quiet and Smooth

Your landing should be quiet and smooth. Prepare your legs to soak up the landing (remember, your legs are another form of suspension on the bike – put them to work). Maintain a slight bend in the knees so you can take up the landing.

If you are landing on descending ground, you want to land front wheel first (OR, both wheels at the exact same time). On a descending landing, do you not want to land rear wheel first as you will likely get whiplash as you front wheels slams down.

Another thing to consider- keep the landing quiet! If you’ve ever watched an advanced rider hit a big drop – they make it look so smooth and easy AND they land quietly. No big thud. No jerky motions. No whiplash.

Here is a easy exercise you can do to help your body and mind understand what a “quiet” landing feels like. Without your bike, jump straight up and down and try to land as LOUD as possible. Then do that same thing again, this time trying to land as QUIETLY as possible. Can you hear (or see) the difference? What are you doing differently with your landing? On the “quiet” landing, you should be gently soaking up the jump with your legs. You want to do the same thing on a drop!

6. Roll Out

As you land, return to your ready position with your body centered and your eyes looking up and ahead. Quickly returning this position will set you up to safely tackle whatever obstacles come up next.

Thanks to Instructor Jeremiah “Scratch” Stone for showing us how it’s done in these photos!

3 Responses

  1. Great question, Chris. Having your seat up significantly limits your ability to explode DOWN and back because it’s in the dang way. Always drop your seat before hitting a drop. Happy dropping!

  2. Not long ago I was doing a roughly 2′ drop to a somewhat sloped landing. Everything was fine until, just as I was starting the “down” move, my thumb hit my dropper release and popped the seat right back up under me….
    With no time to reset, I just made my “back” move as strong as I could and held on. It was a bit of a nose heavy landing, but I managed to ride away. I immediately adjusted the location of the dropper switch, though!

Leave a Reply

Your email address will not be published. Required fields are marked *

keep me in the loop

NOTIFY ME!

I’d like to be notified when new events are added.

Your Privacy is Protected. We will never sell or share your information.

Fundamentals Trail Application - Women's Only

Here’s What We’ll Cover

The specific skills taught in this clinic will depend on available trail features and will vary between locations. Skills covered may include:

  • Rock / Log Step-Ups 
  • Pedal Assisted Front Wheel Lifts
  • Steep Transitions, Roll-Downs
  • Reading trail and line choice
  • Using trail features for maximum flow
  • Turning (Low Speed)
  • Navigating Trail Obstacles
  • Switchbacks – Optimal Line Choice
  • Ratcheting application – how & when 
  • Track stands
  • Braking for Speed 
  • Shifting – Timing + Technique on Technical Terrain
  • Skinnies
  • Off-Camber Trails 
  • Berms 
  • Water crossings 
  • Roots 

The Schedule*

  • 1:15-1:30pm Meet your instructor  | Arrival at course venue + equipment check
  • 1:30 – 1:45pm Fundamentals Skills | Rapid Review 
  • 1:45 – 3:45pm Coached Trail Ride | Sessioning & Skills Application
  • 3:45-4:00pm Review, questions & next steps | #Ridelikeaninja

*Clinic schedule and skills covered may vary according to location and terrain.

Fundamentals Trail Application

Here’s What We’ll Cover

The specific skills taught in this clinic will depend on available trail features and will vary between locations. Skills covered may include:

  • Rock / Log Step-Ups 
  • Pedal Assisted Front Wheel Lifts
  • Steep Transitions, Roll-Downs
  • Reading trail and line choice
  • Using trail features for maximum flow
  • Turning (Low Speed)
  • Navigating Trail Obstacles
  • Switchbacks – Optimal Line Choice
  • Ratcheting application – how & when 
  • Track stands
  • Braking for Speed 
  • Shifting – Timing + Technique on Technical Terrain
  • Skinnies
  • Off-Camber Trails 
  • Berms 
  • Water crossings 
  • Roots 

The Schedule*

  • 1:15-1:30pm Meet your instructor  | Arrival at course venue + equipment check
  • 1:30 – 1:45pm Fundamentals Skills | Rapid Review 
  • 1:45 – 3:45pm Coached Trail Ride | Sessioning & Skills Application
  • 3:45-4:00pm Review, questions & next steps | #Ridelikeaninja

*Clinic schedule and skills covered may vary according to location and terrain.

Ninja Kids clinics

Here’s What We’ll Cover

Some of the skills taught and practiced in the Kids Fundamentals Clinic may include:

  • Ninja (Ready) Position
  • The Riding Rainbow: Body Position
  • How to use your gears
  • Front + Rear Wheel Lifts
  • Safely getting on/off your bike
  • Getting over trail obstacles
  • Turning + Switchbacks
  • Reading the trail: Red Light, Yellow Light, Green Light
  • When and how to brake
  • The 4 Climbing Positions
  • Descending in control
  • How to have fun and be safe!
  • Safety check, bike care

Clinic schedule, time and skills covered may vary according to location and terrain.

2-Day CAMPS

Sample Camp Schedule*

Day 1 (Saturday)

  • 8:45-9:00 Meet your instructor  | Arrival at course venue + equipment check
  • 9:00-9:15 Let’s get started | Introductions, camp overview, bike safety check, bike set-up review
  • 9:15-9:30 Warm-up ride | Head to skills area
  • 9:30-12:15 Mornings skills session | Ready position, bike-body separation, effective braking, fluid shifting, body positioning, wheel lifts
  • 12:15-1:30 Lunch break | BYO
  • 1:30 – 4:00 Intro to jumping | Manuals, bunny hops + how to safely jumping (and land) your mountain bike

Day 2 (Sunday)

  • 8:45-9:00 Meet at trailhead | Gear up for day 2!
  • 9:00-9:15 Review | Brief review of Day 1 skills
  • 9:15-12:00 Morning skills session | High-speed cornering, switchbacks, drops, rock dodge, technical climbing & descending
  • 12:00-1:00  Lunch break | BYO
  • 1:00-3:45 Trail ride + skills application | Put those skills to work!
  • 3:45-4:00 Review, questions & next steps | #Ridelikeaninja


*Clinic schedule and skills covered may vary according to location and terrain.

After camp, you will see an immediate improvement in your riding and a boost in confidence on technical trails. You will be able to tackle rougher terrain and corners with greater control and flow through singletrack, switchbacks, and berms with more speed and efficiency.

Jumping Mini-Clinics

Here’s What We’ll Cover

Some of the skills taught and practiced in the Jumping Mini-Clinic may include:

  • Wheel lift Review
  • Bunny hops
  • Jumping body positioning
  • Anatomy of a jump
  • Speed vs. compression | How and when?
  • Landing with precision
  • Let’s get jumping! | Jump progressions

The Schedule*

Please note, clinics may vary according to location and terrain.

  • 1:30-1:45  Meet your instructor | Arrival at course venue + equipment check
  • 1:45-2:00 Let’s get started | Introductions
  • 2:00 – 2:30  Intro to jumping | Wheel lifts, manual, bunny hop
  • 2:30 – 3:00 Reading the jump | Anatomy of a jump, speed vs compression, landings
  • 3:00 – 3:45 Let’s jump! | Jumping progressions on table tops
  • 3:45-4:00 Review and next steps | #ridelikeaninja


*Clinic schedule and skills covered may vary according to location and terrain.

Intermediate / advanced clincs

Here’s What We’ll Cover

Some of the skills taught and practiced in the Intermediate/Advanced clinic may include:

  • Negotiating trail obstacles (i.e. rock gardens, roots, logs)
  • Steep transitions
  • Drops
  • High speed cornering
  • Technical climbing
  • Technical descending
  • Advanced braking
  • Reading the trail
  • Introduction to energy management & flow
  • Pumping for speed & air
  • Technical Switchbacks (where available)
  • Ratcheting & Trackstands
  • Visualization

The Schedule*

  • 8:45-9:00 Meet your instructor  | Arrival at course venue + equipment check
  • 9:00-9:15 Let’s get started | Introductions
  • 9:15-9:45 Accelerated review of Fundamentals | With intermediate+advanced progressions
  • 9:45-12:00 Morning skills session | High-speed cornering, Switchbacks, drops, rock dodge, technical climbing & descending
  • 12:00-1:00  Lunch break | BYO
  • 1:00-3:45 Trail ride + skills application | Put those skills to work!
  • 3:45-4:00 Review, questions & next steps | #Ridelikeaninja

*Clinic schedule and skills covered may vary according to location and terrain.

WOMEN'S ONLY Fundamentals Combo

Here’s What We’ll Cover

The specific skills taught in this clinic will depend on available trail features and will vary between locations. Skills covered may include:

  • The Ready Position
  • Bike/Body Separation
  • Intro to Steep Transitions
  • Effective Braking
  • Braking for speed
  • Wheels lifts – Step-Ups
  • Shifting, Timing & Cadence
  • Negotiating trail obstacles
  • Turning / Switchbacks
  • Climbing + Descending
  • Dismounting
  • Mind skills
  • Steep Transitions, Roll-Downs
  • Reading trail and line choice
  • Using trail features for flow
  • Turning (Low Speed)
  • Ratcheting – how & when 
  • Track stands
  • Skinnies
  • Off-Camber Trails
  • Berms
  • Water crossings
  • Roots

The Schedule*

  • 8:45-9:00  Meet your instructor  | Arrival at course venue + equipment check
  • 9:00-9:15 Let’s get started | Introductions
  • 9:15am – 11:15 Skills & drills | Learn, learn, learn
  • 11:15am – 12:15 Take it to the trail | Apply what you’ve learned
  • 12:15 – 1:30pm Lunch Break | Rest & Refuel
  • 1:30 – 1:45pm Fundamentals Skills | Rapid Review 
  • 1:45 – 3:45pm Coached Trail Ride | Sessioning & Skills Application
  • 3:45-4:00pm Review, questions & next steps | #Ridelikeaninja

*Clinic schedule and skills covered may vary according to location and terrain.

Co-ed Fundamentals Combo

Here’s What We’ll Cover

The specific skills taught in this clinic will depend on available trail features and will vary between locations. Skills covered may include:

  • The Ready Position
  • Bike/Body Separation
  • Intro to Steep Transitions
  • Effective Braking
  • Braking for speed
  • Wheels lifts – Step-Ups
  • Shifting, Timing & Cadence
  • Negotiating trail obstacles
  • Turning / Switchbacks
  • Climbing + Descending
  • Dismounting
  • Mind skills
  • Steep Transitions, Roll-Downs
  • Reading trail and line choice
  • Using trail features for flow
  • Turning (Low Speed)
  • Ratcheting – how & when 
  • Track stands
  • Skinnies
  • Off-Camber Trails
  • Berms
  • Water crossings
  • Roots

The Schedule*

  • 8:45-9:00  Meet your instructor  | Arrival at course venue + equipment check
  • 9:00-9:15 Let’s get started | Introductions
  • 9:15am – 11:15 Skills & drills | Learn, learn, learn
  • 11:15am – 12:15 Take it to the trail | Apply what you’ve learned
  • 12:15 – 1:30pm Lunch Break | Rest & Refuel
  • 1:30 – 1:45pm Fundamentals Skills | Rapid Review 
  • 1:45 – 3:45pm Coached Trail Ride | Sessioning & Skills Application
  • 3:45-4:00pm Review, questions & next steps | #Ridelikeaninja

*Clinic schedule and skills covered may vary according to location and terrain.

Ninja MTB Logo

Women's Only Fundamentals Clinics

Level 1 - Here’s What We’ll Cover

Some of the skills taught and practiced in the Women’s Only Fundamentals Clinic may include:

  • The Ready Position
  • Bike/Body separation
  • Intro to Steep Transitions
  • Effective braking
  • Wheels lifts
  • Shifting + cadence
  • Negotiating trail obstacles
  • Turning / Switchbacks
  • Climbing + Descending
  • Dismounting
  • Mind skills

The Schedule*

  • 8:45-9:00  Meet your instructor  | Arrival at course venue + equipment check
  • 9:00-9:15 Let’s get started | Introductions
  • 9:15am – 11:15 Skills & drills | Learn, learn, learn
  • 11:15am – 12:00 Take it to the trail | Apply what you’ve learned
  • 12:00-12:15 Review and next steps | #ridelikeaninja
 

*Clinic schedule and skills covered may vary according to location and terrain.

Ninja MTB Logo

Co-ed Fundamentals Clinics

Level 1 - Here’s What We’ll Cover

Some of the skills taught and practiced in the Fundamentals Clinic may include:

  • The Ready Position
  • Bike/Body separation
  • Intro to Steep Transitions
  • Effective braking
  • Wheels lifts
  • Shifting + cadence
  • Negotiating trail obstacles
  • Turning / Switchbacks
  • Climbing + Descending
  • Dismounting
  • Mind skills

The Schedule*

  • 8:45-9:00  Meet your instructor  | Arrival at course venue + equipment check
  • 9:00-9:15 Let’s get started | Introductions
  • 9:15am – 11:15 Skills & drills | Learn, learn, learn
  • 11:15am – 12:00 Take it to the trail | Apply what you’ve learned
  • 12:00-12:15 Review and next steps | #ridelikeaninja
 

*Clinic schedule and skills covered may vary according to location and terrain.

LEAVING SO SOON?

60% Off

IF YOU SIGN UP FOR A MTB SKILLS CLINIC TODAY!

Enter your email below to get your limited time coupon code (valid for 48 hours).

Valid on all Skills Camps and Clinics. Your Privacy is Protected.

Awesome sauce!

60% Off

USE THIS CODE TO SIGN UP TODAY!

CHECKOUT4XY2

*Limited time offer. Valid for 48 hours on any upcoming MTB skills clinic or camp.