10% off All Jump Ramps | Use Code: MOBILE10 | Expires Fri 4/19 

How-to-jump-over-obstacles-in-mountain-biking-1

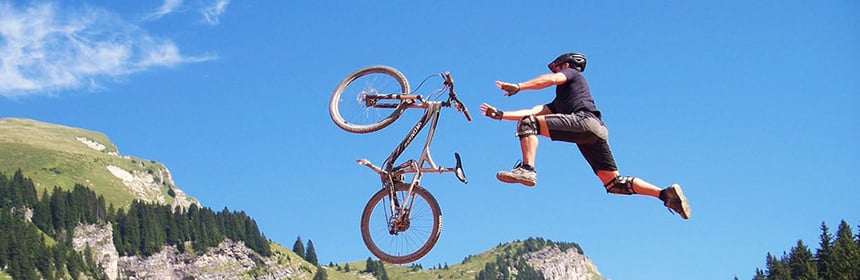
One of the frequently asked questions we get about jumping has do do with why riders struggle with keeping their feet in contact with the pedals once airborne.   Below, is a email we received from Rich G., a recent Jumping Mini-clinic participant, and the response from one of our Lead Instructors, Aaron Lucy.   Please comment below with you thoughts — did this help you?


Hello Ninjas!

Thanks again for an awesome experience at the last jump clinic; I’ve been telling everyone who will listen how awesome it was and can’t wait for my NICA racer/daughter to attend.

I’ve been practicing the new skills, but have a question…..  If I was riding clips, I might be blissfully ignorant, but riding flat pedals, I’m noticing that on certain  jumps, my feet are NOT staying planted on the pedals.  Landing with one’s feet floating an inch above the pedal platform is unnerving to say the least, but it’s good that I’m aware that I’m doing something wrong (SPD set up would rob me of that).

Do I need a punchier attack/explosion on takeoff?  More of a bar push (forward and down) in the air? Any coaching is appreciated.

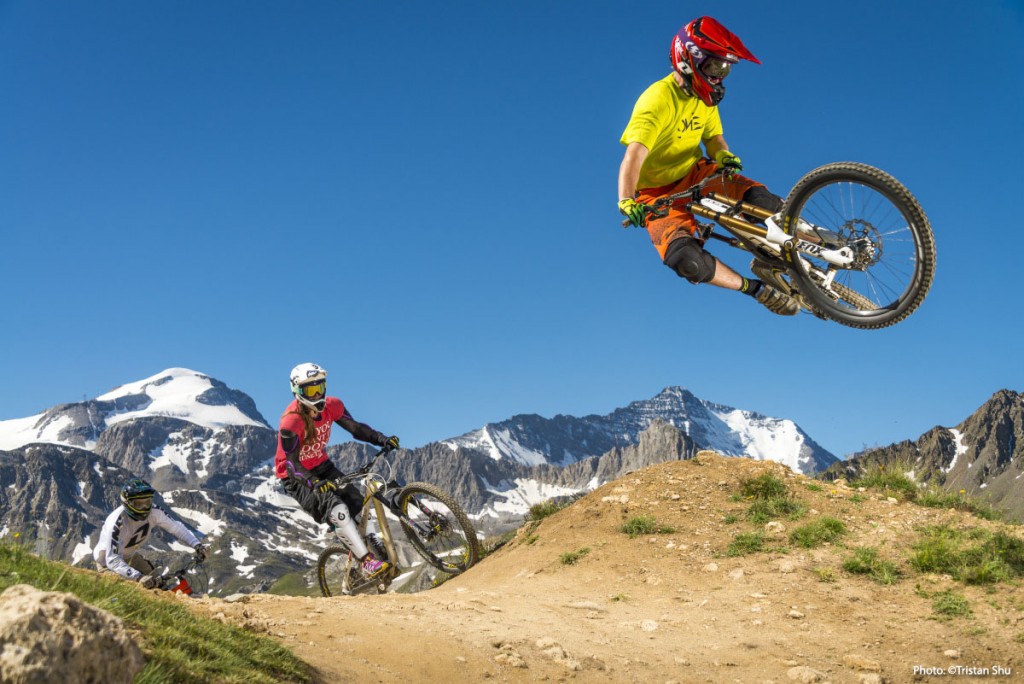
The guy on the gold Intense Spider 29C,

Rich G.


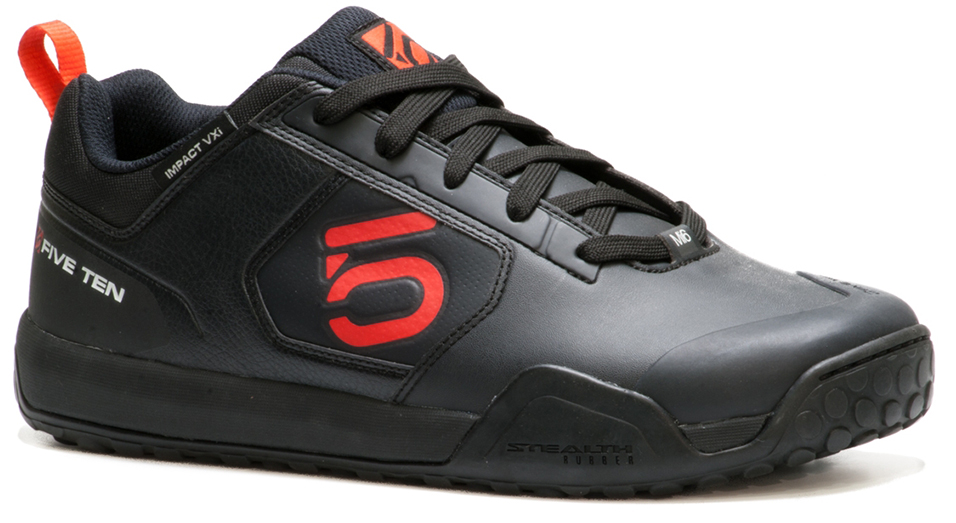
The first thing i’d like to check is that you have a good Shoe/Pedal combination. Good shoes and pedals are vital for maintaining contact with your bike. Purpose built shoes work far better than any kind of tennis of skate shoe, Five Ten Impact VXI are the best I have tried and are my personal preference.

Recommended Shoe :: Five Ten Impact VXI

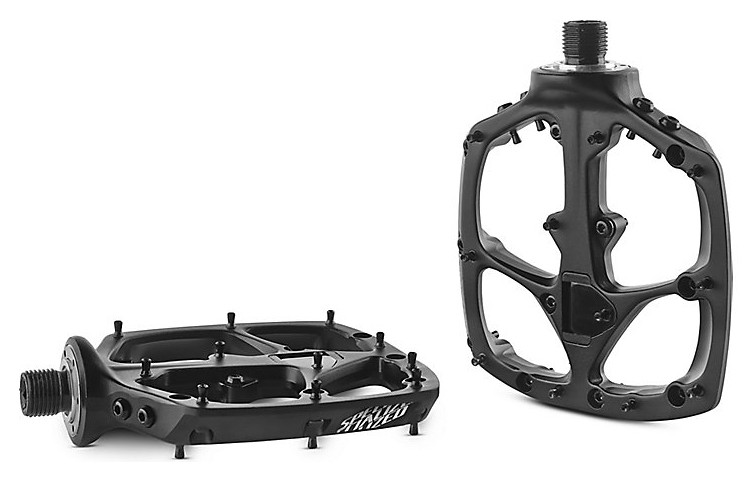
Even the most aggressive flat pedals will not be effective without good shoes. As for the pedals themselves, thinner is better as they lower your center of gravity and it is easier to control the angle of your pedals. A concave shape also helps maintain the most contact points with your shoe. I use Specialized Boomslang pedals and have found them to work very well.

s780_Specialized_Boomslang_Flat_Pedal

The next thing to consider is foot placement. You should place your foot on the pedal so that the axle of the pedal sits behind the ball of your foot. This differs to how you would place your foot with clipless pedals and will help to prevent you from springing up and off of the pedals if you extend your foot downwards.

Photo credit: Matt Edwards

There are a couple of techniques I would suggest to make sure your feet do not raise off the pedals when jumping.

Firstly make sure you are relaxed while approaching the jump. If you are tense on takeoff you will be stiff in the air which can cause you to become unbalanced or push the bike away from you.

Make sure you use a Point of Commitment when approaching the jump. Once you reach the Point of Commitment stop pedaling, relax and center yourself on the bike.

Compress down into your bike right before you begin the transition up the face of the jump. Push through your arms and legs (mostly legs) all the way up the face of the jump to project your body up into the air.

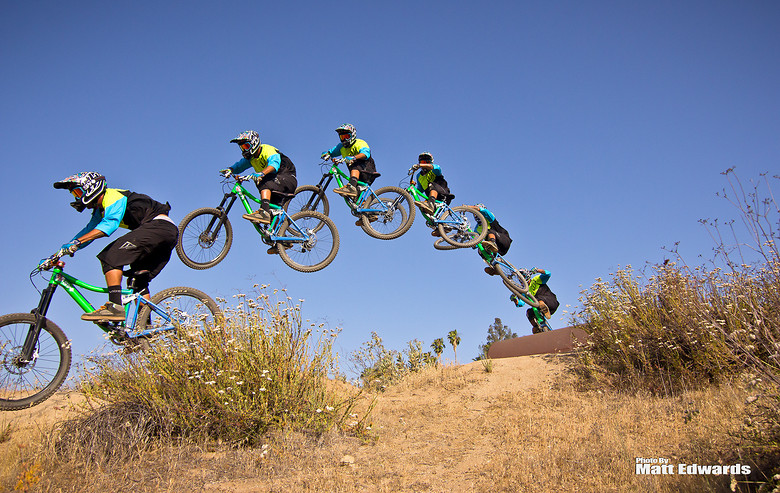
As you take off it is important to realize that your body and the bike will want to travel in slightly different arcs with the arc of the bike naturally soaring higher than that of your body. You have to allow the bike to travel upwards towards your body by bending your arms and legs and drawing the bike up towards you.

If you keep your arms and legs stiff after you take off you will change the natural arc of the bike which may cause it to fall away from you in the air and result in your feet losing contact with the pedals.

mountain bike jumping

Secondly, you can maintain contact with your pedals by creating tension between your pedals and handlebars. This is achieved by pointing your toes down slightly and dragging backwards on the pedals.

Its important to note that you should not push back too hard, just a little should do it. A great way to practice this is by doing rear wheel lifts. While riding on flat ground compress down into your pedals and spring immediately back up. Allow your weight to come slightly forward as you spring up, point your toes down and push back slightly on the pedals as you draw your legs up towards you bringing the rear wheel off the ground.

Practice this until you can do it without pointing your toes down and you will be a long way towards knowing how to keep a connection with you pedals while in the air.

Hope these techniques help Rich, happy trails!

Aaron Lucy | Lead Skills Instructor

RELATED CONTENT: How To Jump Your Mountain Bike

5 Responses

  1. This article is waaaay overthinking it! Go to a pump track, or a line of whoops. Practice. You can even watch videos or talk to an instructor about pumping. Eventually you’ll get lighter and lighter on the bike going over the rollers until you are actually getting air.

    Trying to think about the bike moving independently in its own arc and trying to create tension between your handlebars and pedals is enough to overload anyone. Beginners aren’t in the air for more than a second, anyway!

    The basics are so-called for a reason. You should be recommending that people learn the basics before progressing to jumps. If his feet are flying off his pedals he needs to take a step back.

  2. Hi Alexa,

    you are absolutely right, practice makes perfect! All the more important when you’re getting your wheels off the ground as the risk factor is definitely increased.

    That is why we are huge advocates of progressing through fundamental bike handling skills before approaching jumping in our lessons. We start small and build gradually.

    Sadly not everyone has access to or endless hours to spend at the pump track (something I think should be remedied immediately!)

    Riders come to us to learn skills at a rate faster than they would work them out alone. Part of how we achieve this is by increasing a riders body awareness, helping them understand the relationship between bike/body and earth. Concepts are introduced and developed throughout the lesson in a way that is progressive and digestible. When practiced on your bike pretty soon these complex thoughts turn into sweet feelings of success as everything starts to make sense!

    Developing skills takes time however and we encourage our students to contact us with questions as they learn and experiment. This article is an example of one of those questions being answered. It is not a complete tutorial on how to jump your bike but simply a small part of the picture.

    Thanks for your feedback Alexa, see you at the pump track!

    Aaron Lucy | Lead Skills Instructor

  3. Great article! I’ve been working on incorporating this and it’s amazing when it all clicks together, how the bike just comes up beneath me and stays stuck to my feet! it’s happening more and more often, so definitely practicing makes perfect. Keep up the good work…and hope to do a jump clinic in person one of these days!

  4. Aaron, really good explanation!! I’ve watched a couple videos about pedals and I don’t recall the tip that “thinner is better”. It makes sense. Thank you for that. Also, your explanation about not keeping my arms and legs stiff through the jump is a good reminder. I’ve read that before but putting into practice is taking time. It doesn’t come naturally. For me, anyway.
    I’m saving this article because for me the more I read good directions, practice them, reread them, and practice them again. My comprehension and understanding along with a lot of practice is evolving into a natural technique. Very rewarding!!!
    And…..less cuts, scrapes, and bruises.
    – curtis

  5. Thanks for the article, some useful tips in there. I’ve made learning to jump my lockdown skill to master and have come a bit stuck on an issue i’m having. I don’t think my feet leave the pedals but once i’m airborne the pedals definitely rotate a half rotation or so before coming back to level for the landing. I’m not conscious of it at the time but it looks real weird in videos. Any tips?

Leave a Reply

Your email address will not be published. Required fields are marked *

keep me in the loop

NOTIFY ME!

I’d like to be notified when new events are added.

Your Privacy is Protected. We will never sell or share your information.

Fundamentals Trail Application - Women's Only

Here’s What We’ll Cover

The specific skills taught in this clinic will depend on available trail features and will vary between locations. Skills covered may include:

  • Rock / Log Step-Ups 
  • Pedal Assisted Front Wheel Lifts
  • Steep Transitions, Roll-Downs
  • Reading trail and line choice
  • Using trail features for maximum flow
  • Turning (Low Speed)
  • Navigating Trail Obstacles
  • Switchbacks – Optimal Line Choice
  • Ratcheting application – how & when 
  • Track stands
  • Braking for Speed 
  • Shifting – Timing + Technique on Technical Terrain
  • Skinnies
  • Off-Camber Trails 
  • Berms 
  • Water crossings 
  • Roots 

The Schedule*

  • 1:15-1:30pm Meet your instructor  | Arrival at course venue + equipment check
  • 1:30 – 1:45pm Fundamentals Skills | Rapid Review 
  • 1:45 – 3:45pm Coached Trail Ride | Sessioning & Skills Application
  • 3:45-4:00pm Review, questions & next steps | #Ridelikeaninja

*Clinic schedule and skills covered may vary according to location and terrain.

Fundamentals Trail Application

Here’s What We’ll Cover

The specific skills taught in this clinic will depend on available trail features and will vary between locations. Skills covered may include:

  • Rock / Log Step-Ups 
  • Pedal Assisted Front Wheel Lifts
  • Steep Transitions, Roll-Downs
  • Reading trail and line choice
  • Using trail features for maximum flow
  • Turning (Low Speed)
  • Navigating Trail Obstacles
  • Switchbacks – Optimal Line Choice
  • Ratcheting application – how & when 
  • Track stands
  • Braking for Speed 
  • Shifting – Timing + Technique on Technical Terrain
  • Skinnies
  • Off-Camber Trails 
  • Berms 
  • Water crossings 
  • Roots 

The Schedule*

  • 1:15-1:30pm Meet your instructor  | Arrival at course venue + equipment check
  • 1:30 – 1:45pm Fundamentals Skills | Rapid Review 
  • 1:45 – 3:45pm Coached Trail Ride | Sessioning & Skills Application
  • 3:45-4:00pm Review, questions & next steps | #Ridelikeaninja

*Clinic schedule and skills covered may vary according to location and terrain.

Ninja Kids clinics

Here’s What We’ll Cover

Some of the skills taught and practiced in the Kids Fundamentals Clinic may include:

  • Ninja (Ready) Position
  • The Riding Rainbow: Body Position
  • How to use your gears
  • Front + Rear Wheel Lifts
  • Safely getting on/off your bike
  • Getting over trail obstacles
  • Turning + Switchbacks
  • Reading the trail: Red Light, Yellow Light, Green Light
  • When and how to brake
  • The 4 Climbing Positions
  • Descending in control
  • How to have fun and be safe!
  • Safety check, bike care

Clinic schedule, time and skills covered may vary according to location and terrain.

2-Day CAMPS

Sample Camp Schedule*

Day 1 (Saturday)

  • 8:45-9:00 Meet your instructor  | Arrival at course venue + equipment check
  • 9:00-9:15 Let’s get started | Introductions, camp overview, bike safety check, bike set-up review
  • 9:15-9:30 Warm-up ride | Head to skills area
  • 9:30-12:15 Mornings skills session | Ready position, bike-body separation, effective braking, fluid shifting, body positioning, wheel lifts
  • 12:15-1:30 Lunch break | BYO
  • 1:30 – 4:00 Intro to jumping | Manuals, bunny hops + how to safely jumping (and land) your mountain bike

Day 2 (Sunday)

  • 8:45-9:00 Meet at trailhead | Gear up for day 2!
  • 9:00-9:15 Review | Brief review of Day 1 skills
  • 9:15-12:00 Morning skills session | High-speed cornering, switchbacks, drops, rock dodge, technical climbing & descending
  • 12:00-1:00  Lunch break | BYO
  • 1:00-3:45 Trail ride + skills application | Put those skills to work!
  • 3:45-4:00 Review, questions & next steps | #Ridelikeaninja


*Clinic schedule and skills covered may vary according to location and terrain.

After camp, you will see an immediate improvement in your riding and a boost in confidence on technical trails. You will be able to tackle rougher terrain and corners with greater control and flow through singletrack, switchbacks, and berms with more speed and efficiency.

Jumping Mini-Clinics

Here’s What We’ll Cover

Some of the skills taught and practiced in the Jumping Mini-Clinic may include:

  • Wheel lift Review
  • Bunny hops
  • Jumping body positioning
  • Anatomy of a jump
  • Speed vs. compression | How and when?
  • Landing with precision
  • Let’s get jumping! | Jump progressions

The Schedule*

Please note, clinics may vary according to location and terrain.

  • 1:30-1:45  Meet your instructor | Arrival at course venue + equipment check
  • 1:45-2:00 Let’s get started | Introductions
  • 2:00 – 2:30  Intro to jumping | Wheel lifts, manual, bunny hop
  • 2:30 – 3:00 Reading the jump | Anatomy of a jump, speed vs compression, landings
  • 3:00 – 3:45 Let’s jump! | Jumping progressions on table tops
  • 3:45-4:00 Review and next steps | #ridelikeaninja


*Clinic schedule and skills covered may vary according to location and terrain.

Intermediate / advanced clincs

Here’s What We’ll Cover

Some of the skills taught and practiced in the Intermediate/Advanced clinic may include:

  • Negotiating trail obstacles (i.e. rock gardens, roots, logs)
  • Steep transitions
  • Drops
  • High speed cornering
  • Technical climbing
  • Technical descending
  • Advanced braking
  • Reading the trail
  • Introduction to energy management & flow
  • Pumping for speed & air
  • Technical Switchbacks (where available)
  • Ratcheting & Trackstands
  • Visualization

The Schedule*

  • 8:45-9:00 Meet your instructor  | Arrival at course venue + equipment check
  • 9:00-9:15 Let’s get started | Introductions
  • 9:15-9:45 Accelerated review of Fundamentals | With intermediate+advanced progressions
  • 9:45-12:00 Morning skills session | High-speed cornering, Switchbacks, drops, rock dodge, technical climbing & descending
  • 12:00-1:00  Lunch break | BYO
  • 1:00-3:45 Trail ride + skills application | Put those skills to work!
  • 3:45-4:00 Review, questions & next steps | #Ridelikeaninja

*Clinic schedule and skills covered may vary according to location and terrain.

WOMEN'S ONLY Fundamentals Combo

Here’s What We’ll Cover

The specific skills taught in this clinic will depend on available trail features and will vary between locations. Skills covered may include:

  • The Ready Position
  • Bike/Body Separation
  • Intro to Steep Transitions
  • Effective Braking
  • Braking for speed
  • Wheels lifts – Step-Ups
  • Shifting, Timing & Cadence
  • Negotiating trail obstacles
  • Turning / Switchbacks
  • Climbing + Descending
  • Dismounting
  • Mind skills
  • Steep Transitions, Roll-Downs
  • Reading trail and line choice
  • Using trail features for flow
  • Turning (Low Speed)
  • Ratcheting – how & when 
  • Track stands
  • Skinnies
  • Off-Camber Trails
  • Berms
  • Water crossings
  • Roots

The Schedule*

  • 8:45-9:00  Meet your instructor  | Arrival at course venue + equipment check
  • 9:00-9:15 Let’s get started | Introductions
  • 9:15am – 11:15 Skills & drills | Learn, learn, learn
  • 11:15am – 12:15 Take it to the trail | Apply what you’ve learned
  • 12:15 – 1:30pm Lunch Break | Rest & Refuel
  • 1:30 – 1:45pm Fundamentals Skills | Rapid Review 
  • 1:45 – 3:45pm Coached Trail Ride | Sessioning & Skills Application
  • 3:45-4:00pm Review, questions & next steps | #Ridelikeaninja

*Clinic schedule and skills covered may vary according to location and terrain.

Co-ed Fundamentals Combo

Here’s What We’ll Cover

The specific skills taught in this clinic will depend on available trail features and will vary between locations. Skills covered may include:

  • The Ready Position
  • Bike/Body Separation
  • Intro to Steep Transitions
  • Effective Braking
  • Braking for speed
  • Wheels lifts – Step-Ups
  • Shifting, Timing & Cadence
  • Negotiating trail obstacles
  • Turning / Switchbacks
  • Climbing + Descending
  • Dismounting
  • Mind skills
  • Steep Transitions, Roll-Downs
  • Reading trail and line choice
  • Using trail features for flow
  • Turning (Low Speed)
  • Ratcheting – how & when 
  • Track stands
  • Skinnies
  • Off-Camber Trails
  • Berms
  • Water crossings
  • Roots

The Schedule*

  • 8:45-9:00  Meet your instructor  | Arrival at course venue + equipment check
  • 9:00-9:15 Let’s get started | Introductions
  • 9:15am – 11:15 Skills & drills | Learn, learn, learn
  • 11:15am – 12:15 Take it to the trail | Apply what you’ve learned
  • 12:15 – 1:30pm Lunch Break | Rest & Refuel
  • 1:30 – 1:45pm Fundamentals Skills | Rapid Review 
  • 1:45 – 3:45pm Coached Trail Ride | Sessioning & Skills Application
  • 3:45-4:00pm Review, questions & next steps | #Ridelikeaninja

*Clinic schedule and skills covered may vary according to location and terrain.

Women's Only Fundamentals Clinics

Level 1 - Here’s What We’ll Cover

Some of the skills taught and practiced in the Women’s Only Fundamentals Clinic may include:

  • The Ready Position
  • Bike/Body separation
  • Intro to Steep Transitions
  • Effective braking
  • Wheels lifts
  • Shifting + cadence
  • Negotiating trail obstacles
  • Turning / Switchbacks
  • Climbing + Descending
  • Dismounting
  • Mind skills

The Schedule*

  • 8:45-9:00  Meet your instructor  | Arrival at course venue + equipment check
  • 9:00-9:15 Let’s get started | Introductions
  • 9:15am – 11:15 Skills & drills | Learn, learn, learn
  • 11:15am – 12:00 Take it to the trail | Apply what you’ve learned
  • 12:00-12:15 Review and next steps | #ridelikeaninja
 

*Clinic schedule and skills covered may vary according to location and terrain.

Co-ed Fundamentals Clinics

Level 1 - Here’s What We’ll Cover

Some of the skills taught and practiced in the Fundamentals Clinic may include:

  • The Ready Position
  • Bike/Body separation
  • Intro to Steep Transitions
  • Effective braking
  • Wheels lifts
  • Shifting + cadence
  • Negotiating trail obstacles
  • Turning / Switchbacks
  • Climbing + Descending
  • Dismounting
  • Mind skills

The Schedule*

  • 8:45-9:00  Meet your instructor  | Arrival at course venue + equipment check
  • 9:00-9:15 Let’s get started | Introductions
  • 9:15am – 11:15 Skills & drills | Learn, learn, learn
  • 11:15am – 12:00 Take it to the trail | Apply what you’ve learned
  • 12:00-12:15 Review and next steps | #ridelikeaninja
 

*Clinic schedule and skills covered may vary according to location and terrain.

LEAVING SO SOON?

60% Off

IF YOU SIGN UP FOR A MTB SKILLS CLINIC TODAY!

Enter your email below to get your limited time coupon code (valid for 48 hours).

Valid on all Skills Camps and Clinics. Your Privacy is Protected.

Awesome sauce!

60% Off

USE THIS CODE TO SIGN UP TODAY!

CHECKOUT4XY2

*Limited time offer. Valid for 48 hours on any upcoming MTB skills clinic or camp.